Learn how to create an NFT Drop with claim phases using the thirdweb dashboard
Let's assume you want to create an NFT Drop or Edition Drop that is limited to your community before it is open to anyone to mint. You can set up special conditions for your NFT Drop using thirdweb’s Claim Phases functionality.
In this guide, we will create a special gold star NFT for early supporters before I open it to the public.
This guide assumes you have created an NFT Drop or Edition Drop on thirdweb and now need to set up claim settings. If you need a refresher on how to do so, check out our NFT Drop with Delayed Reveal Guide.
After creating our NFT Drop or Edition Drop contract, let’s navigate to the Claim Phases tab.
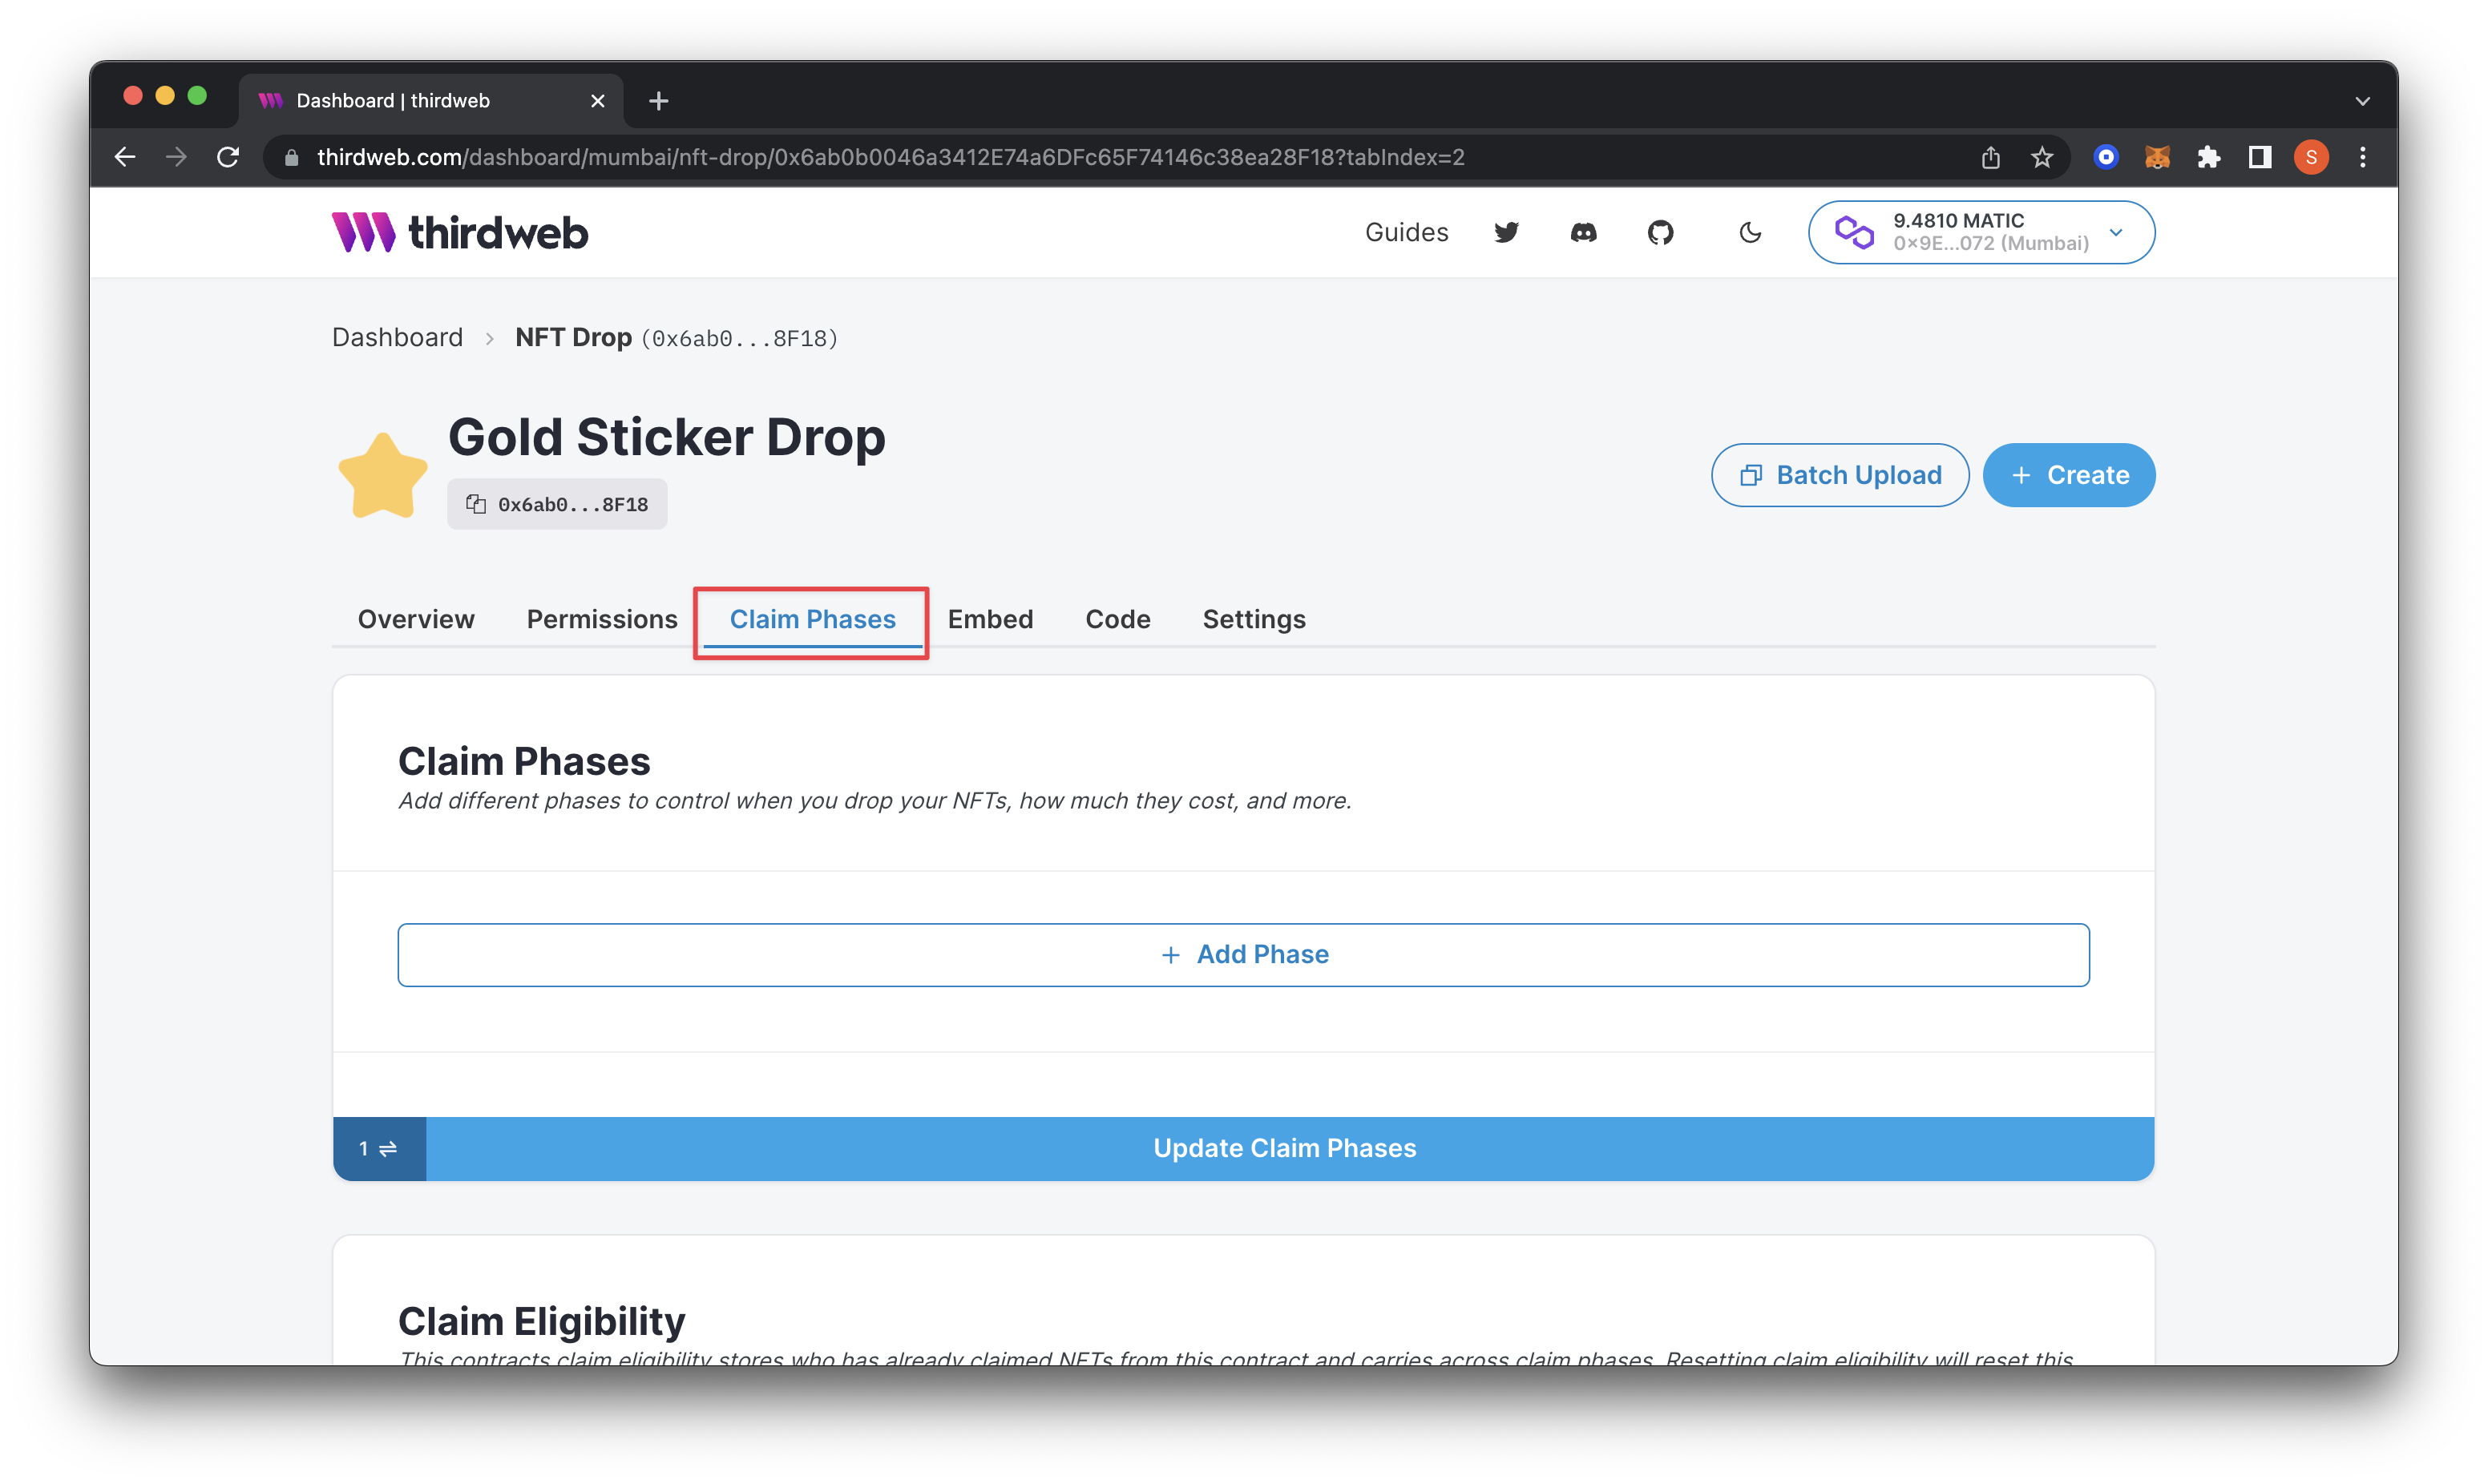
Add Phase
The first phase we will add is for early supporters or the community.
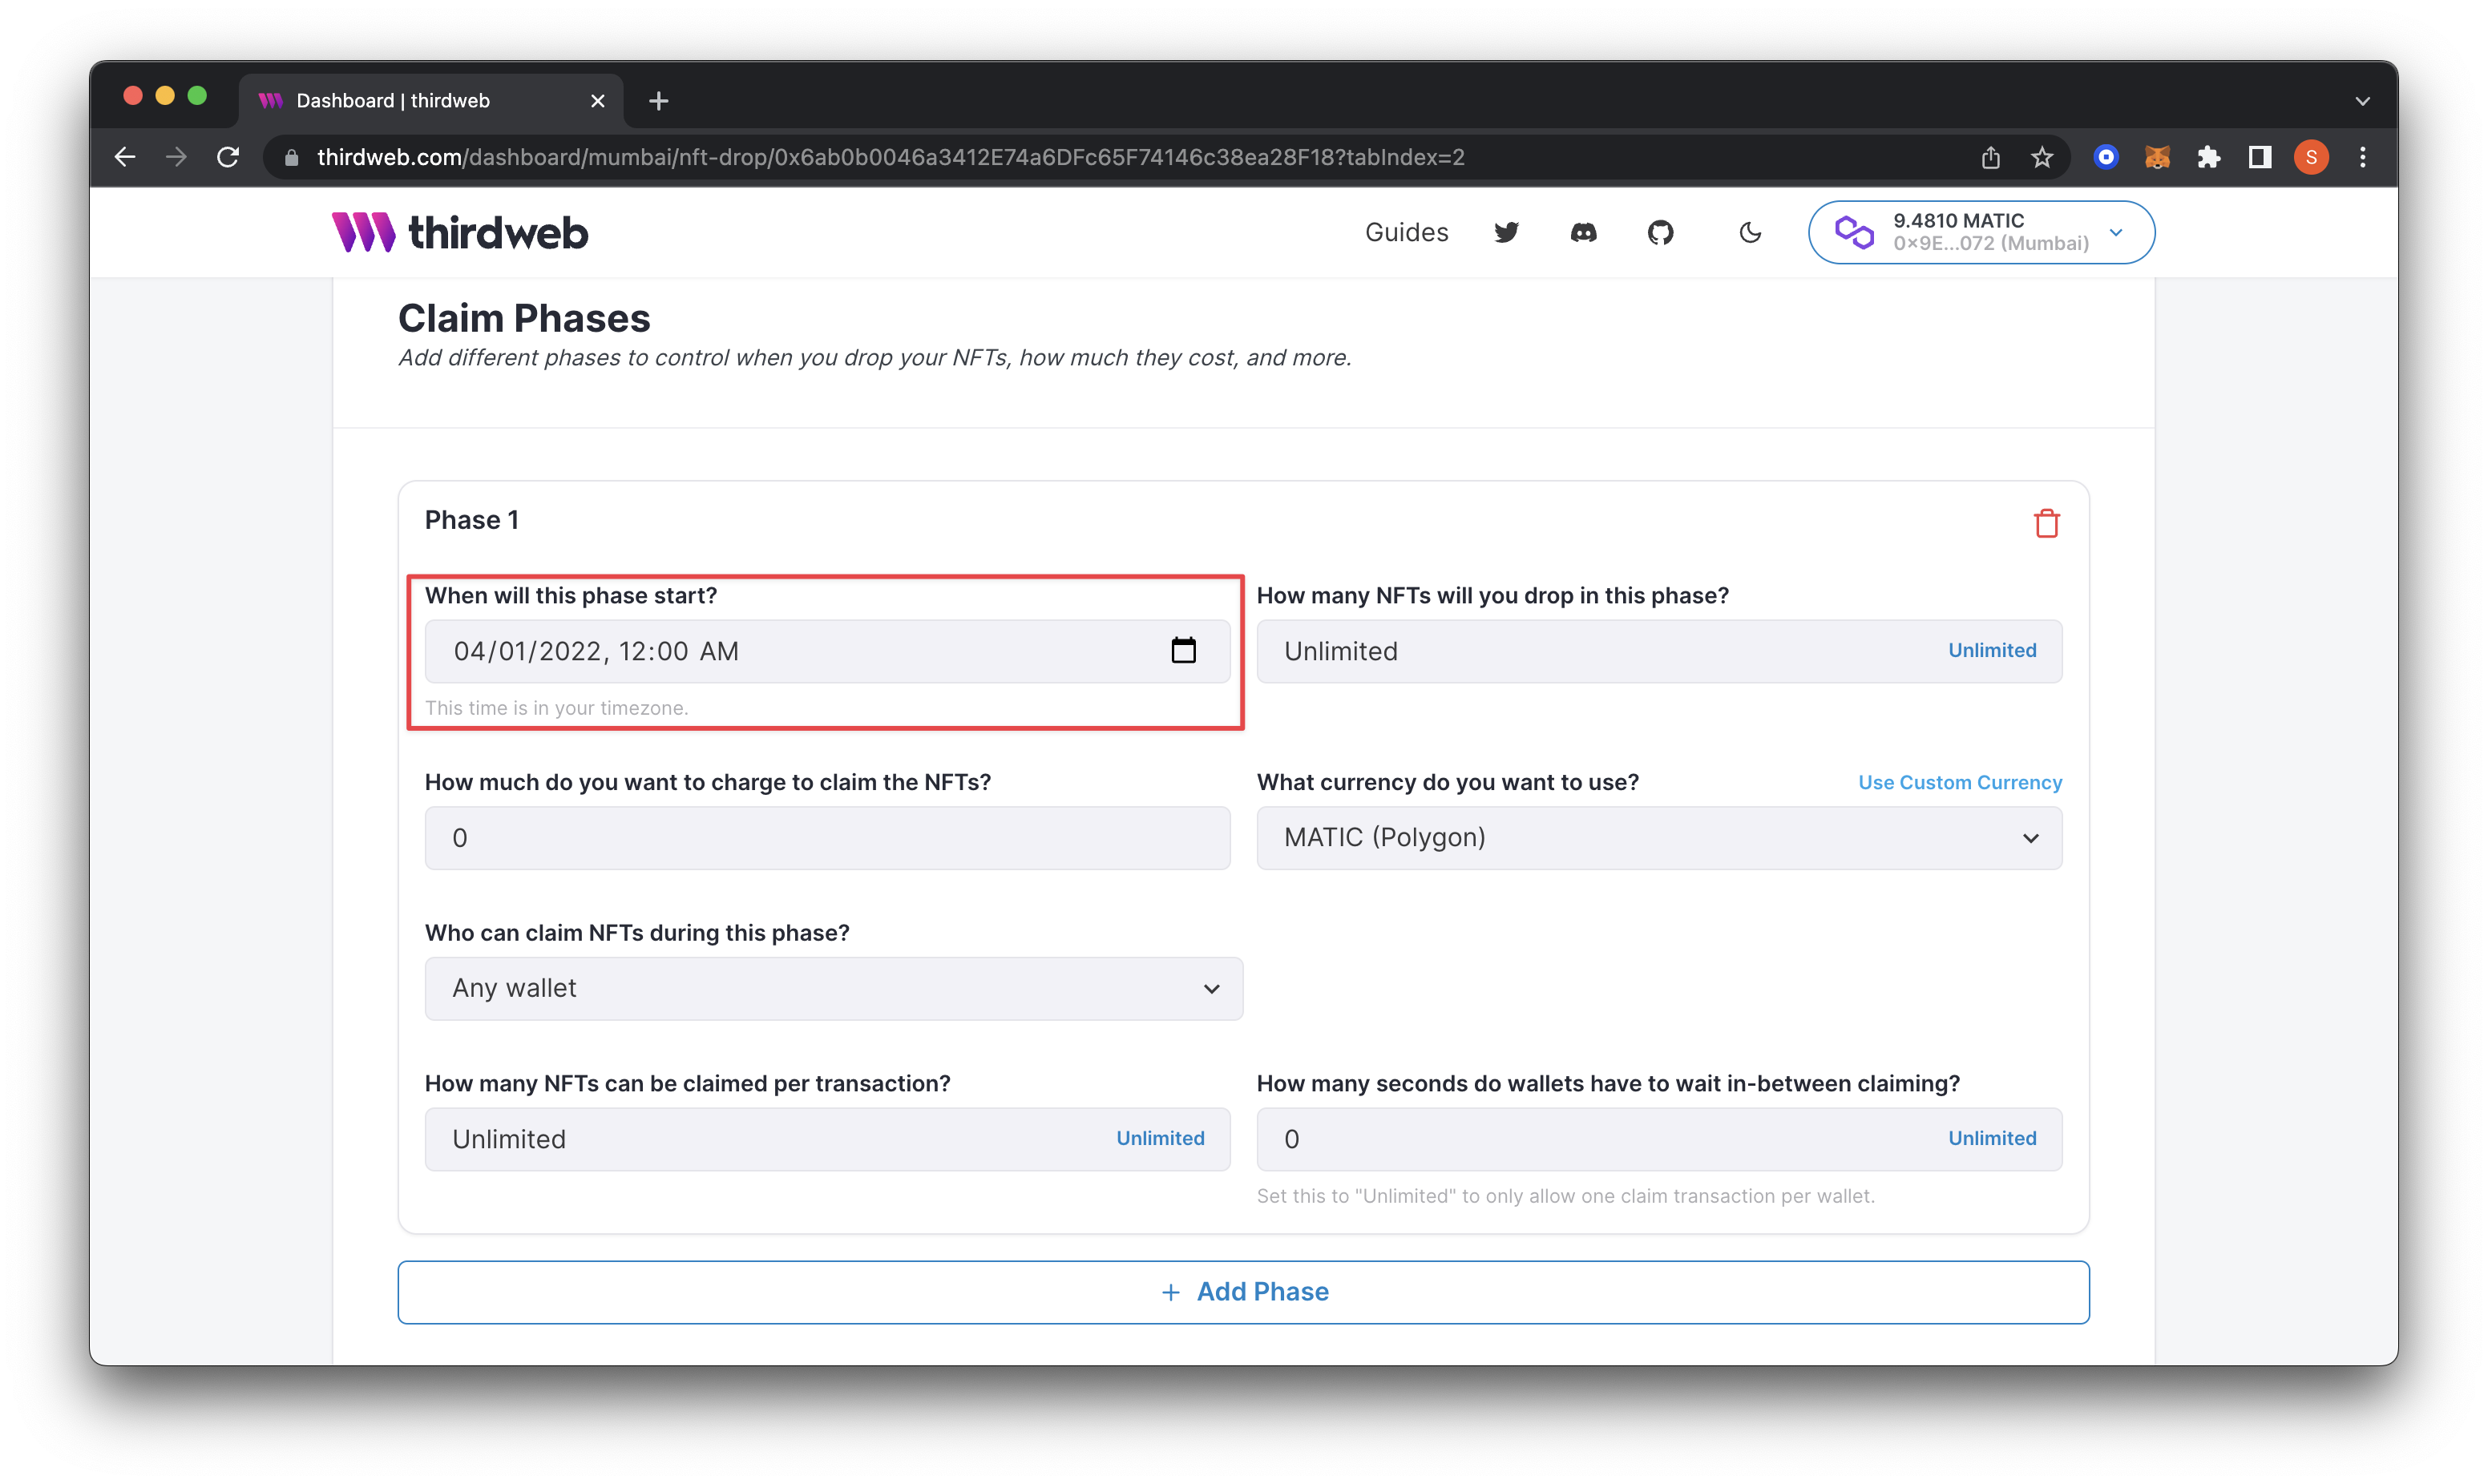
First, we will set "When will this phase start?" to April 1st, 2022 at 12:00 am (local time). This date and time are when I want my community to be able to start claiming the NFT.
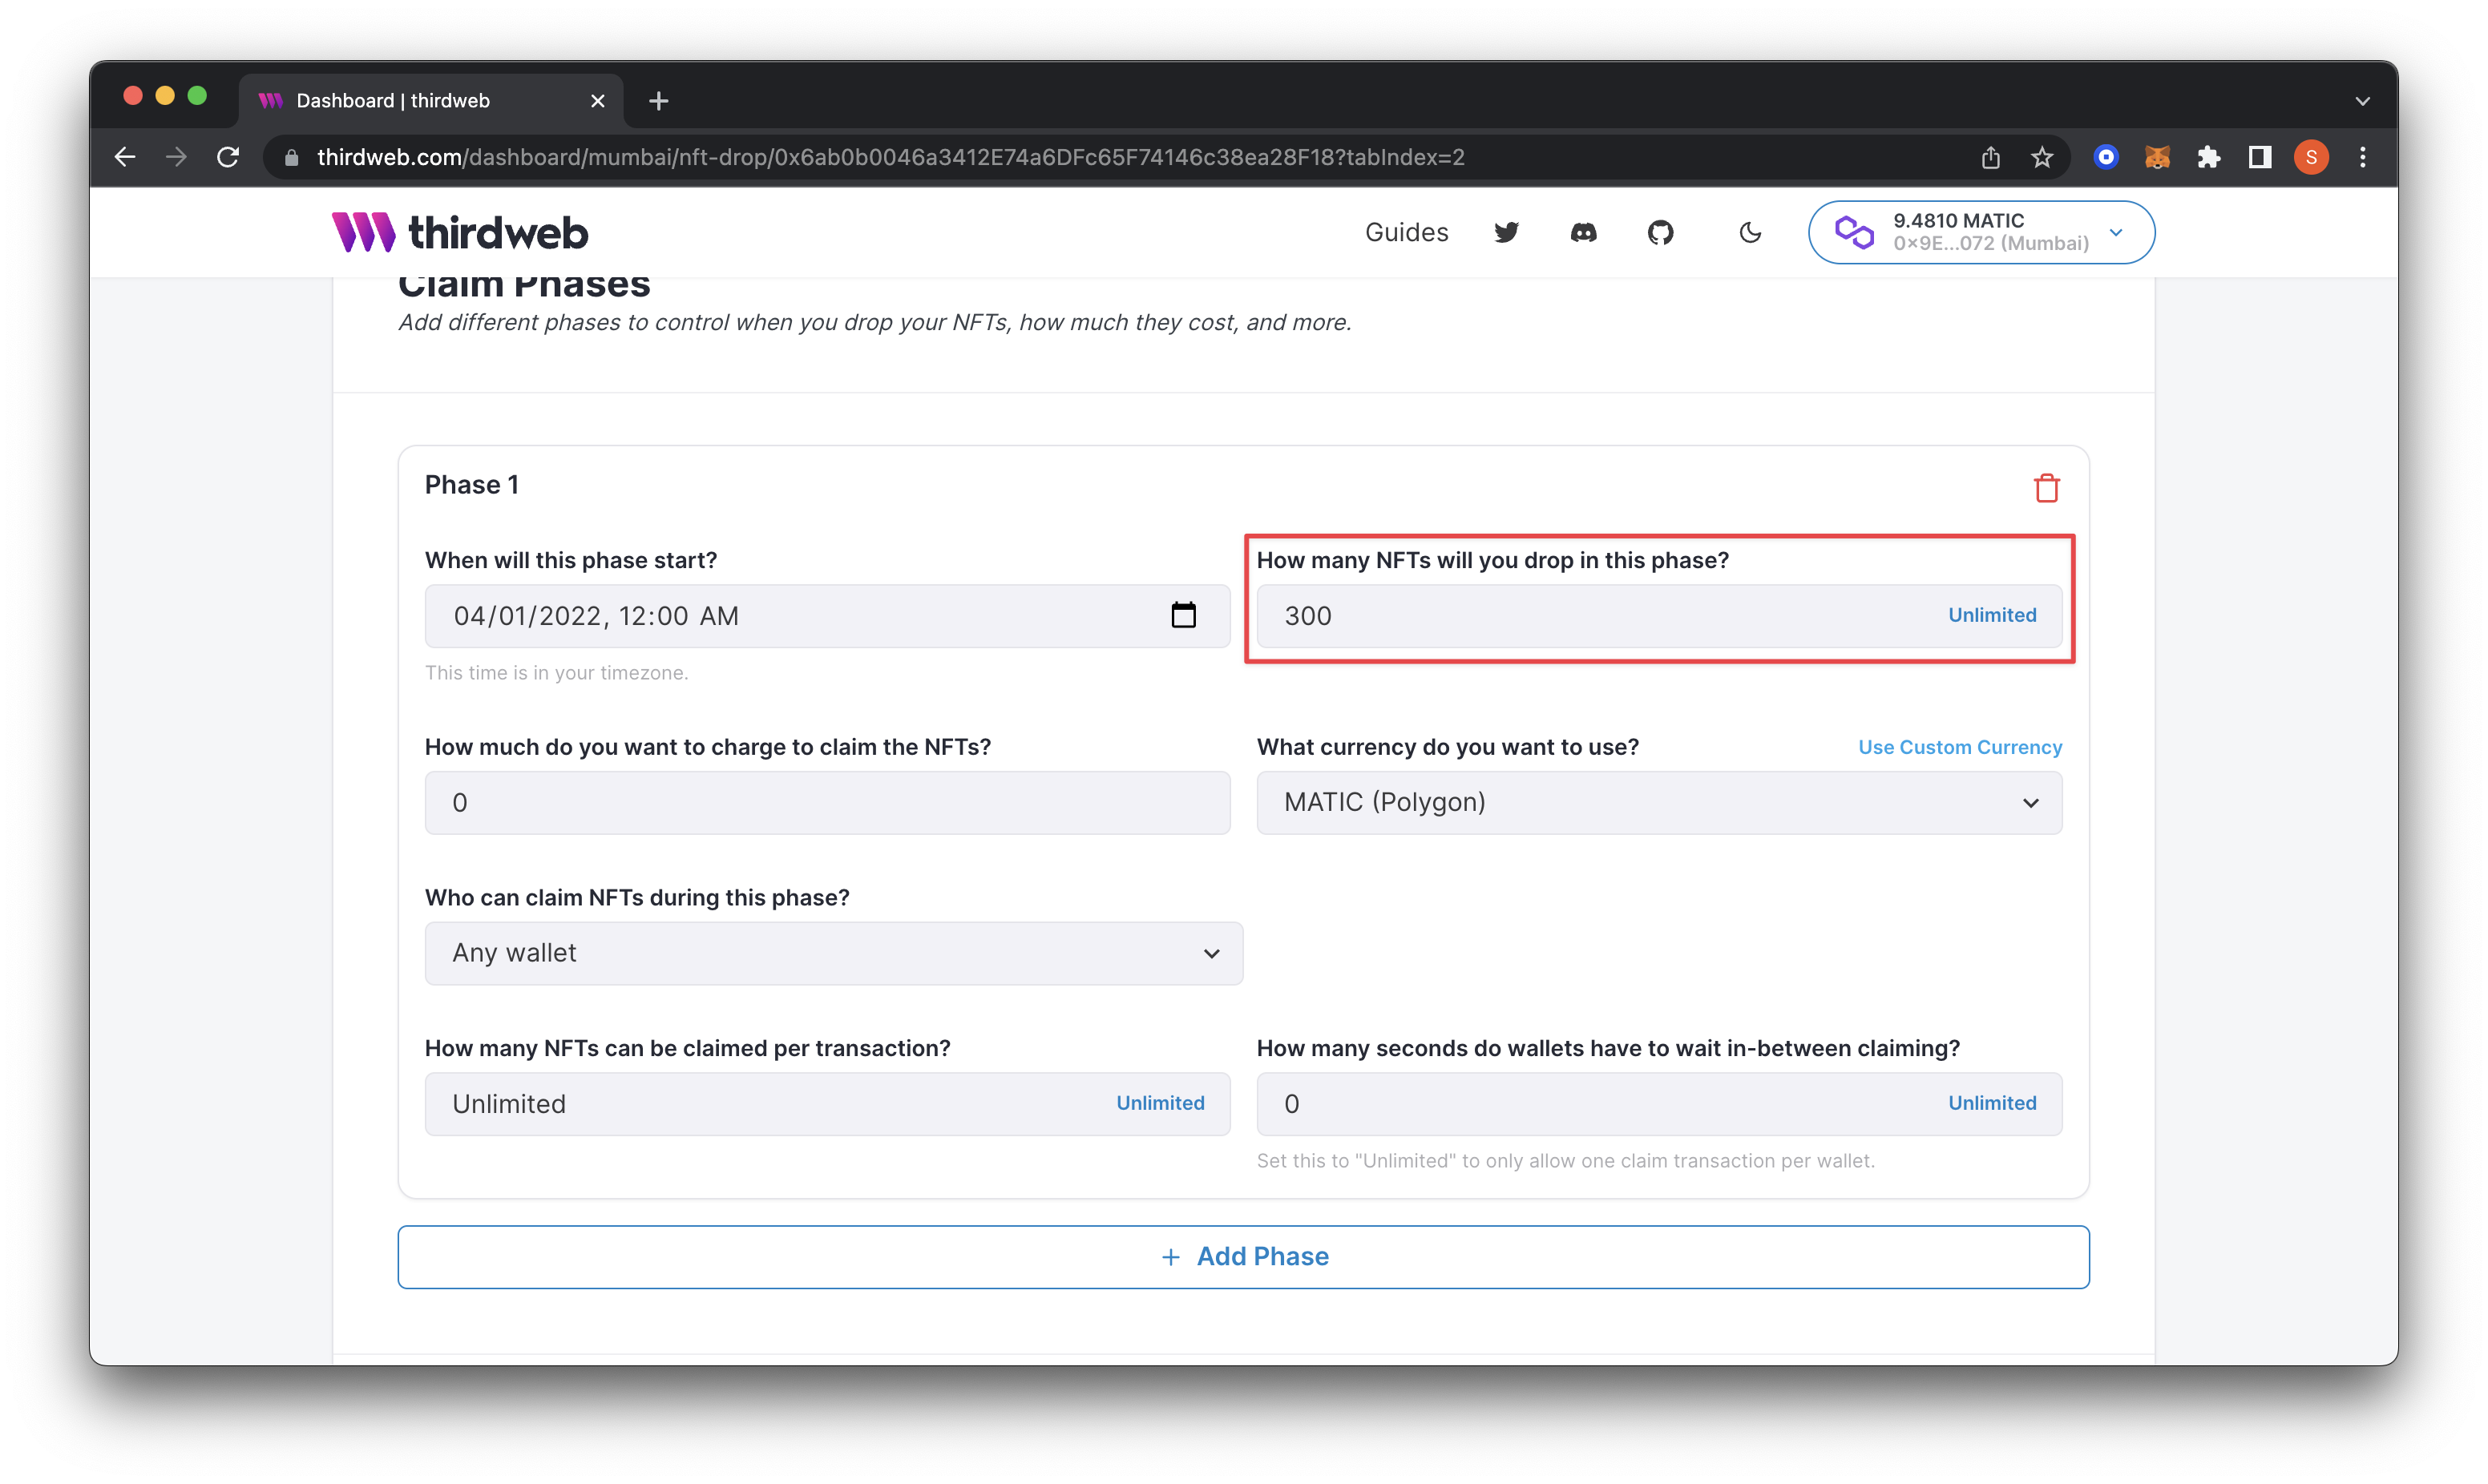
The second setting I will change is "How many NFTs will you drop in this phase?" to "300". I only want to give 300 of the total supply of NFTs out to the community in this phase. Feel free to adjust it to what makes sense for your drop.
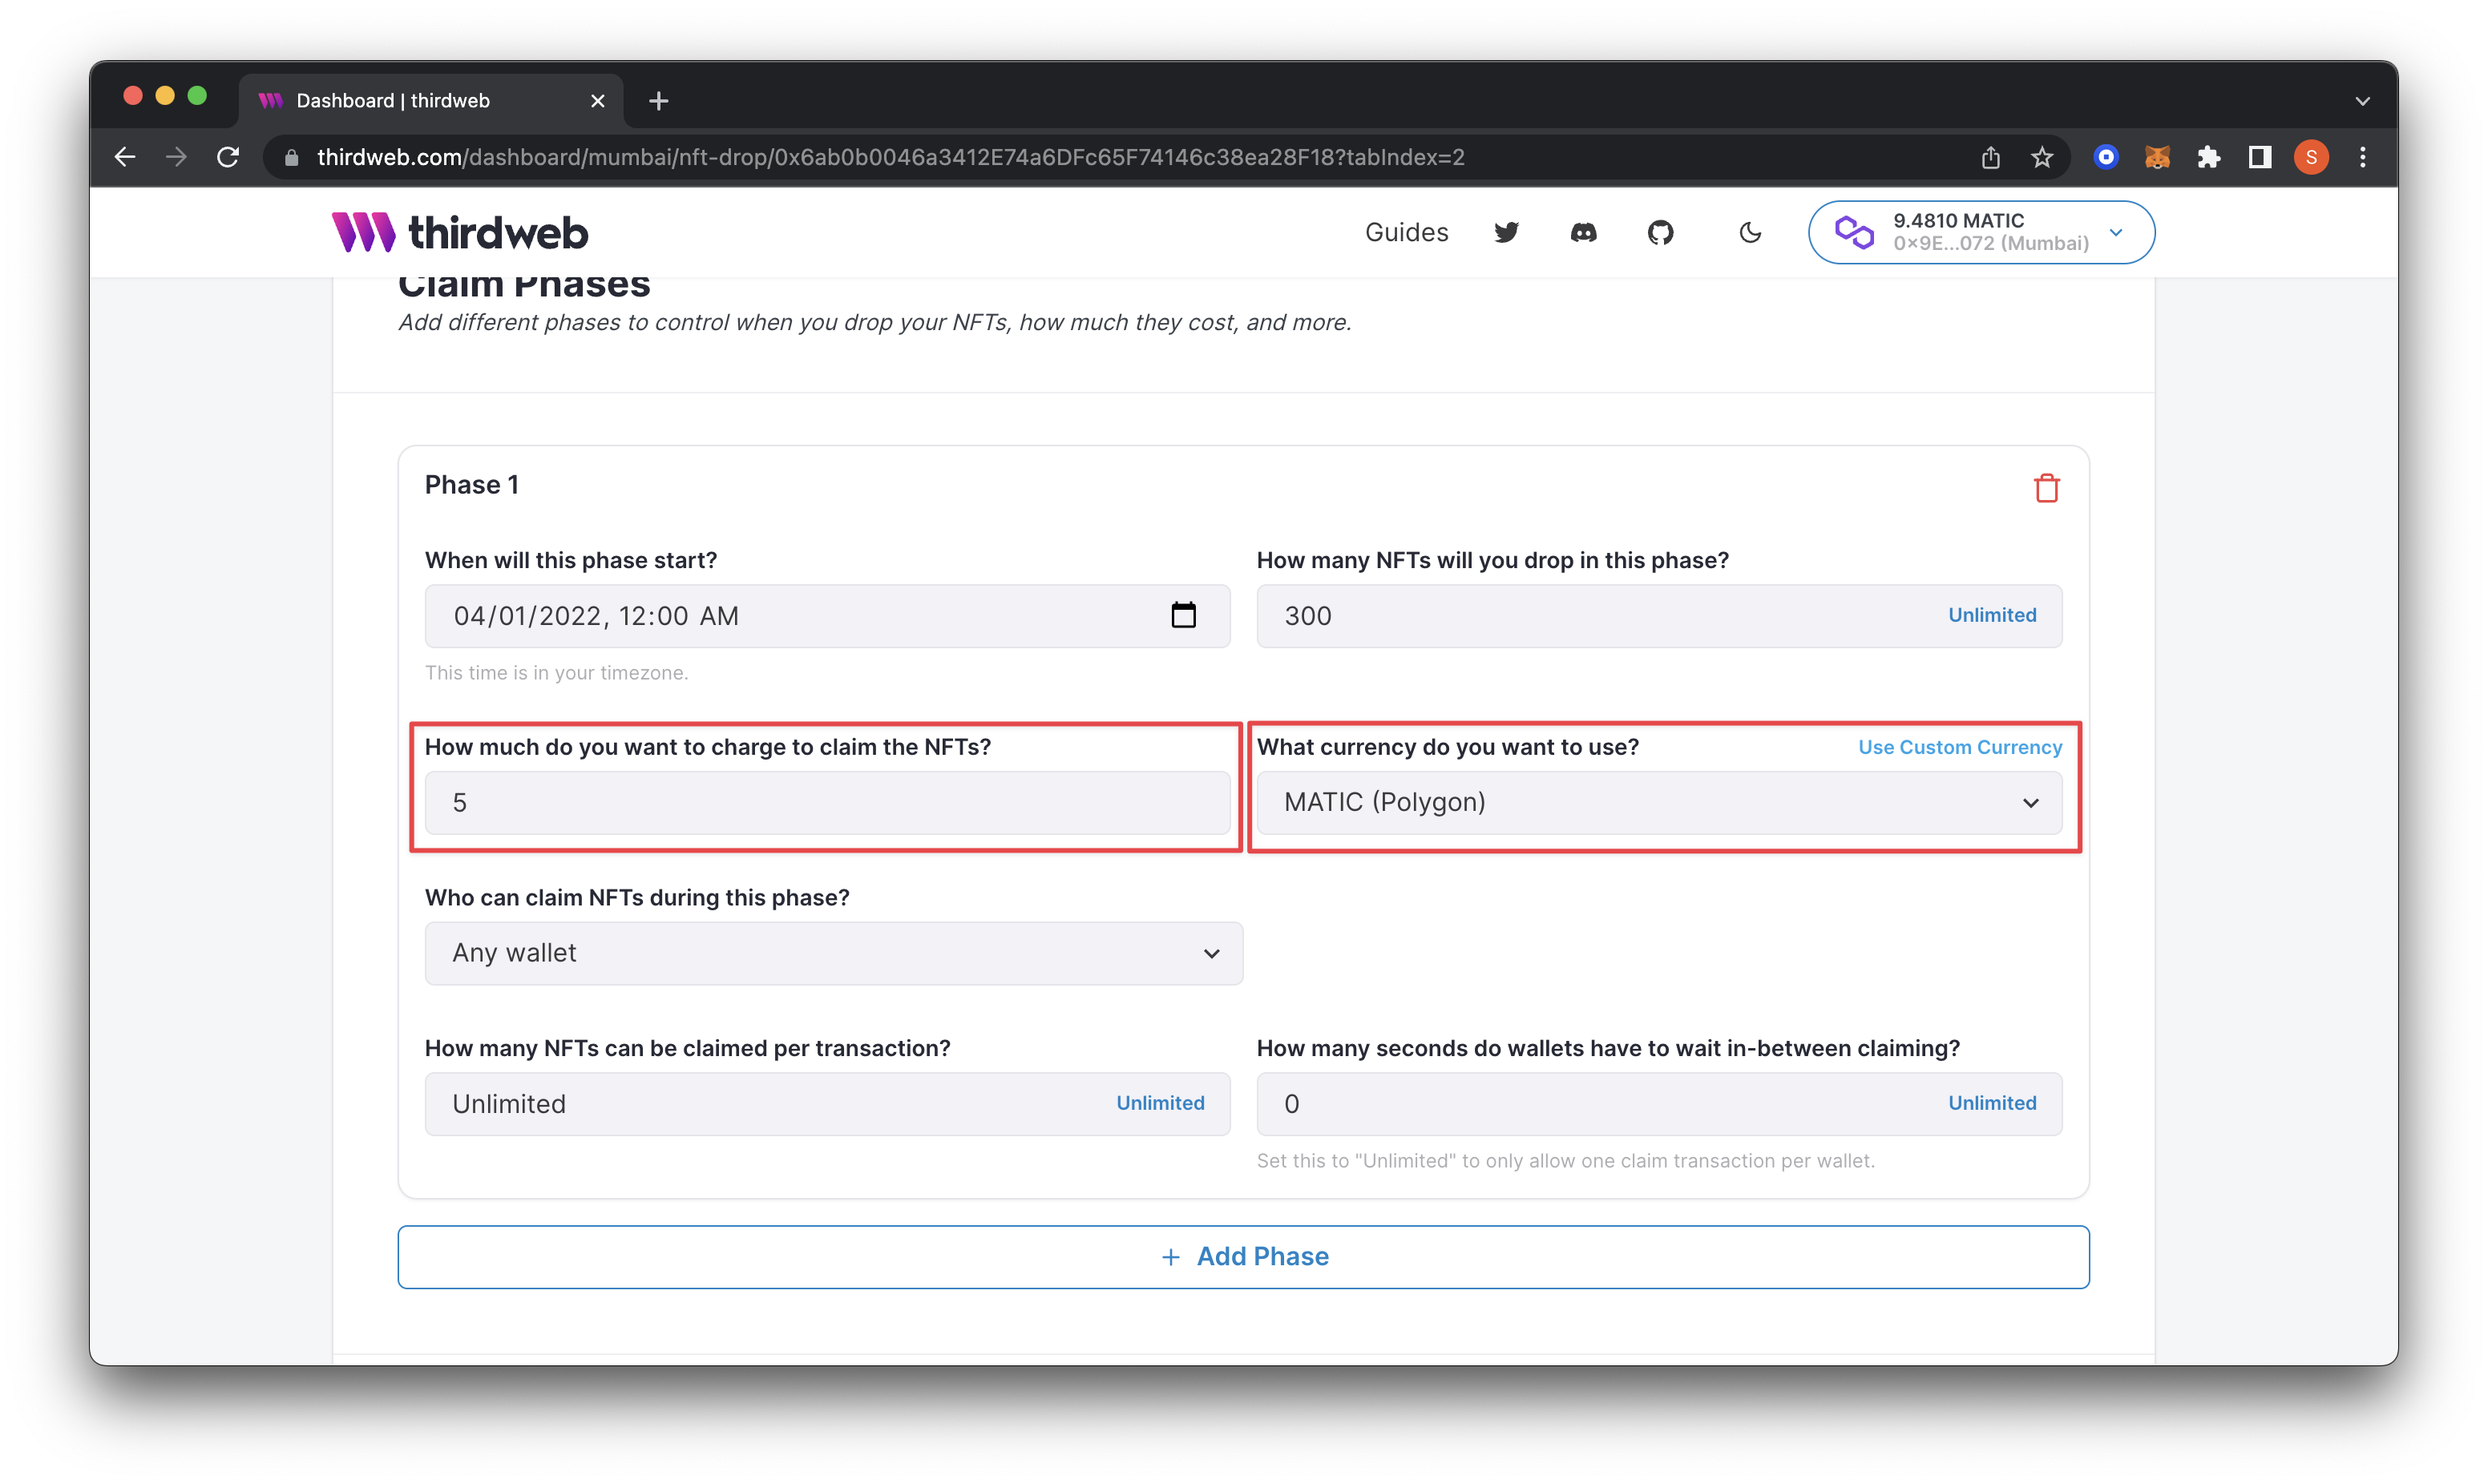
Now, we can set how much we want to charge using "How much do you want to charge to claim the NFTs?" to 5 and change "What currency do you want to use?" to MATIC (Polygon).
Add Allowlist
In this next part, we will limit it to our community by uploading a list of wallet addresses from our community members. Change "Who can claim NFTs during this phase?" to Specific Wallets using the dropdown.
This action will prompt a screen to upload your CSV file. If you already have a CSV file created, go ahead and upload it.
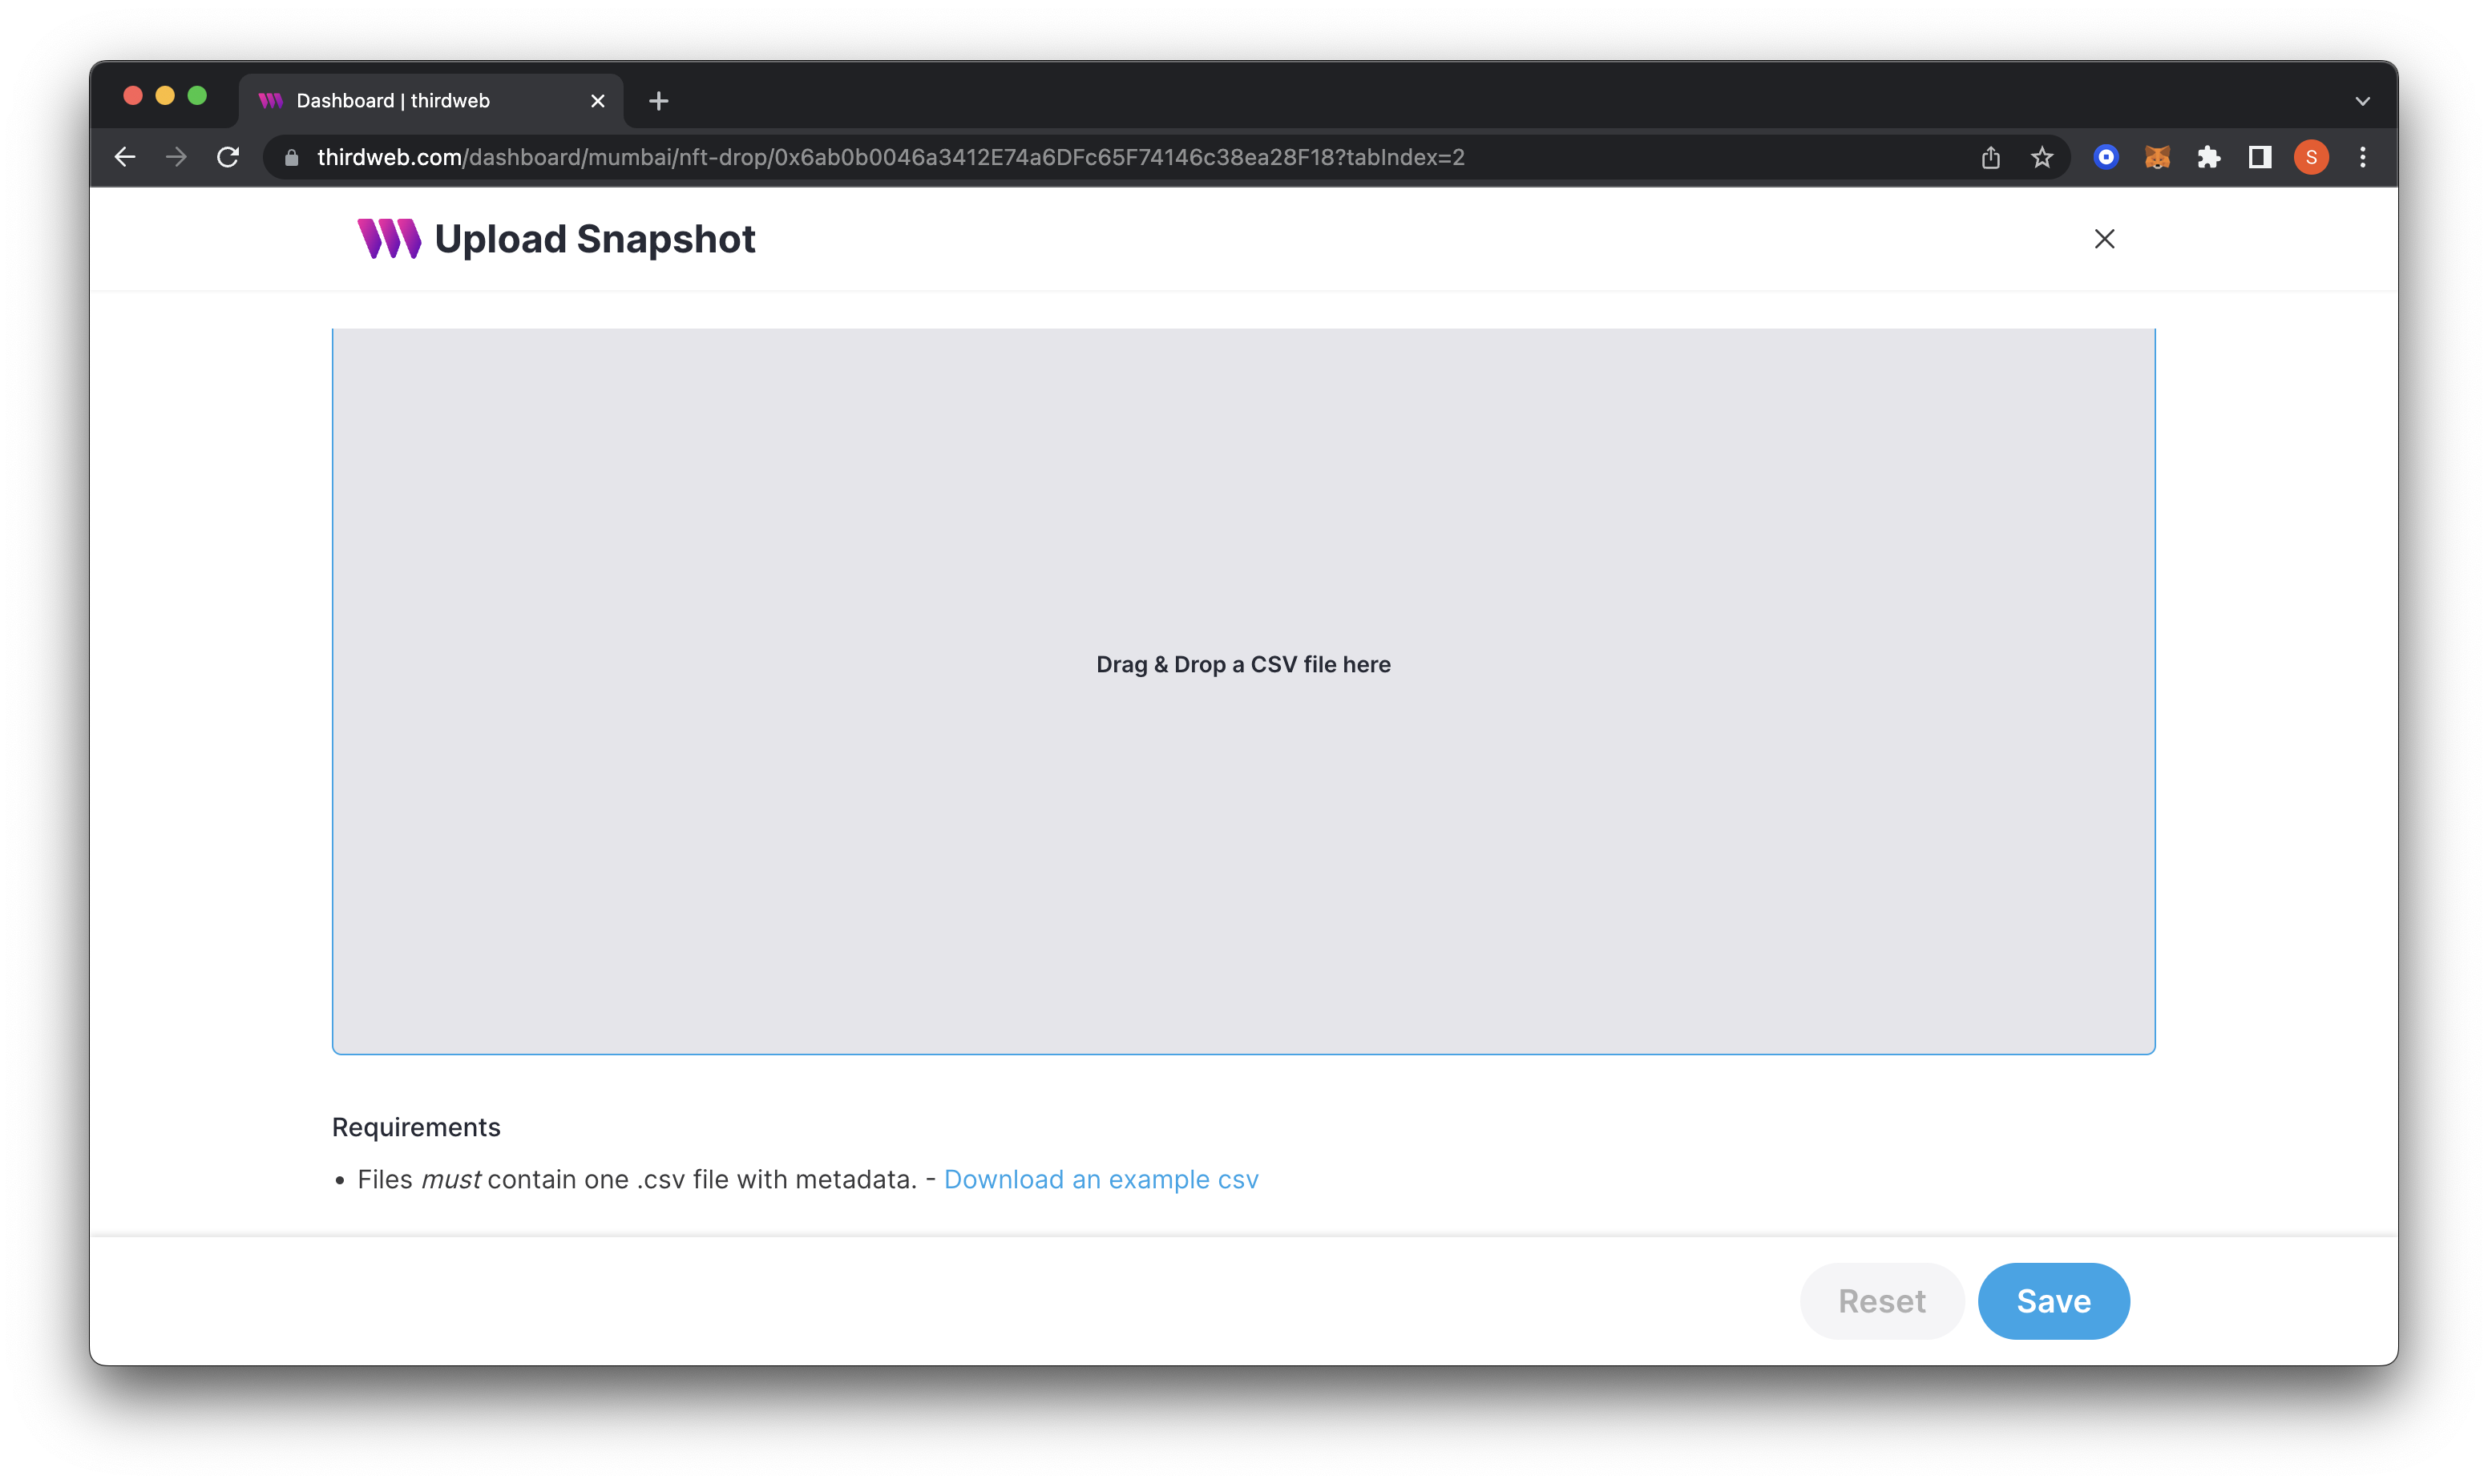
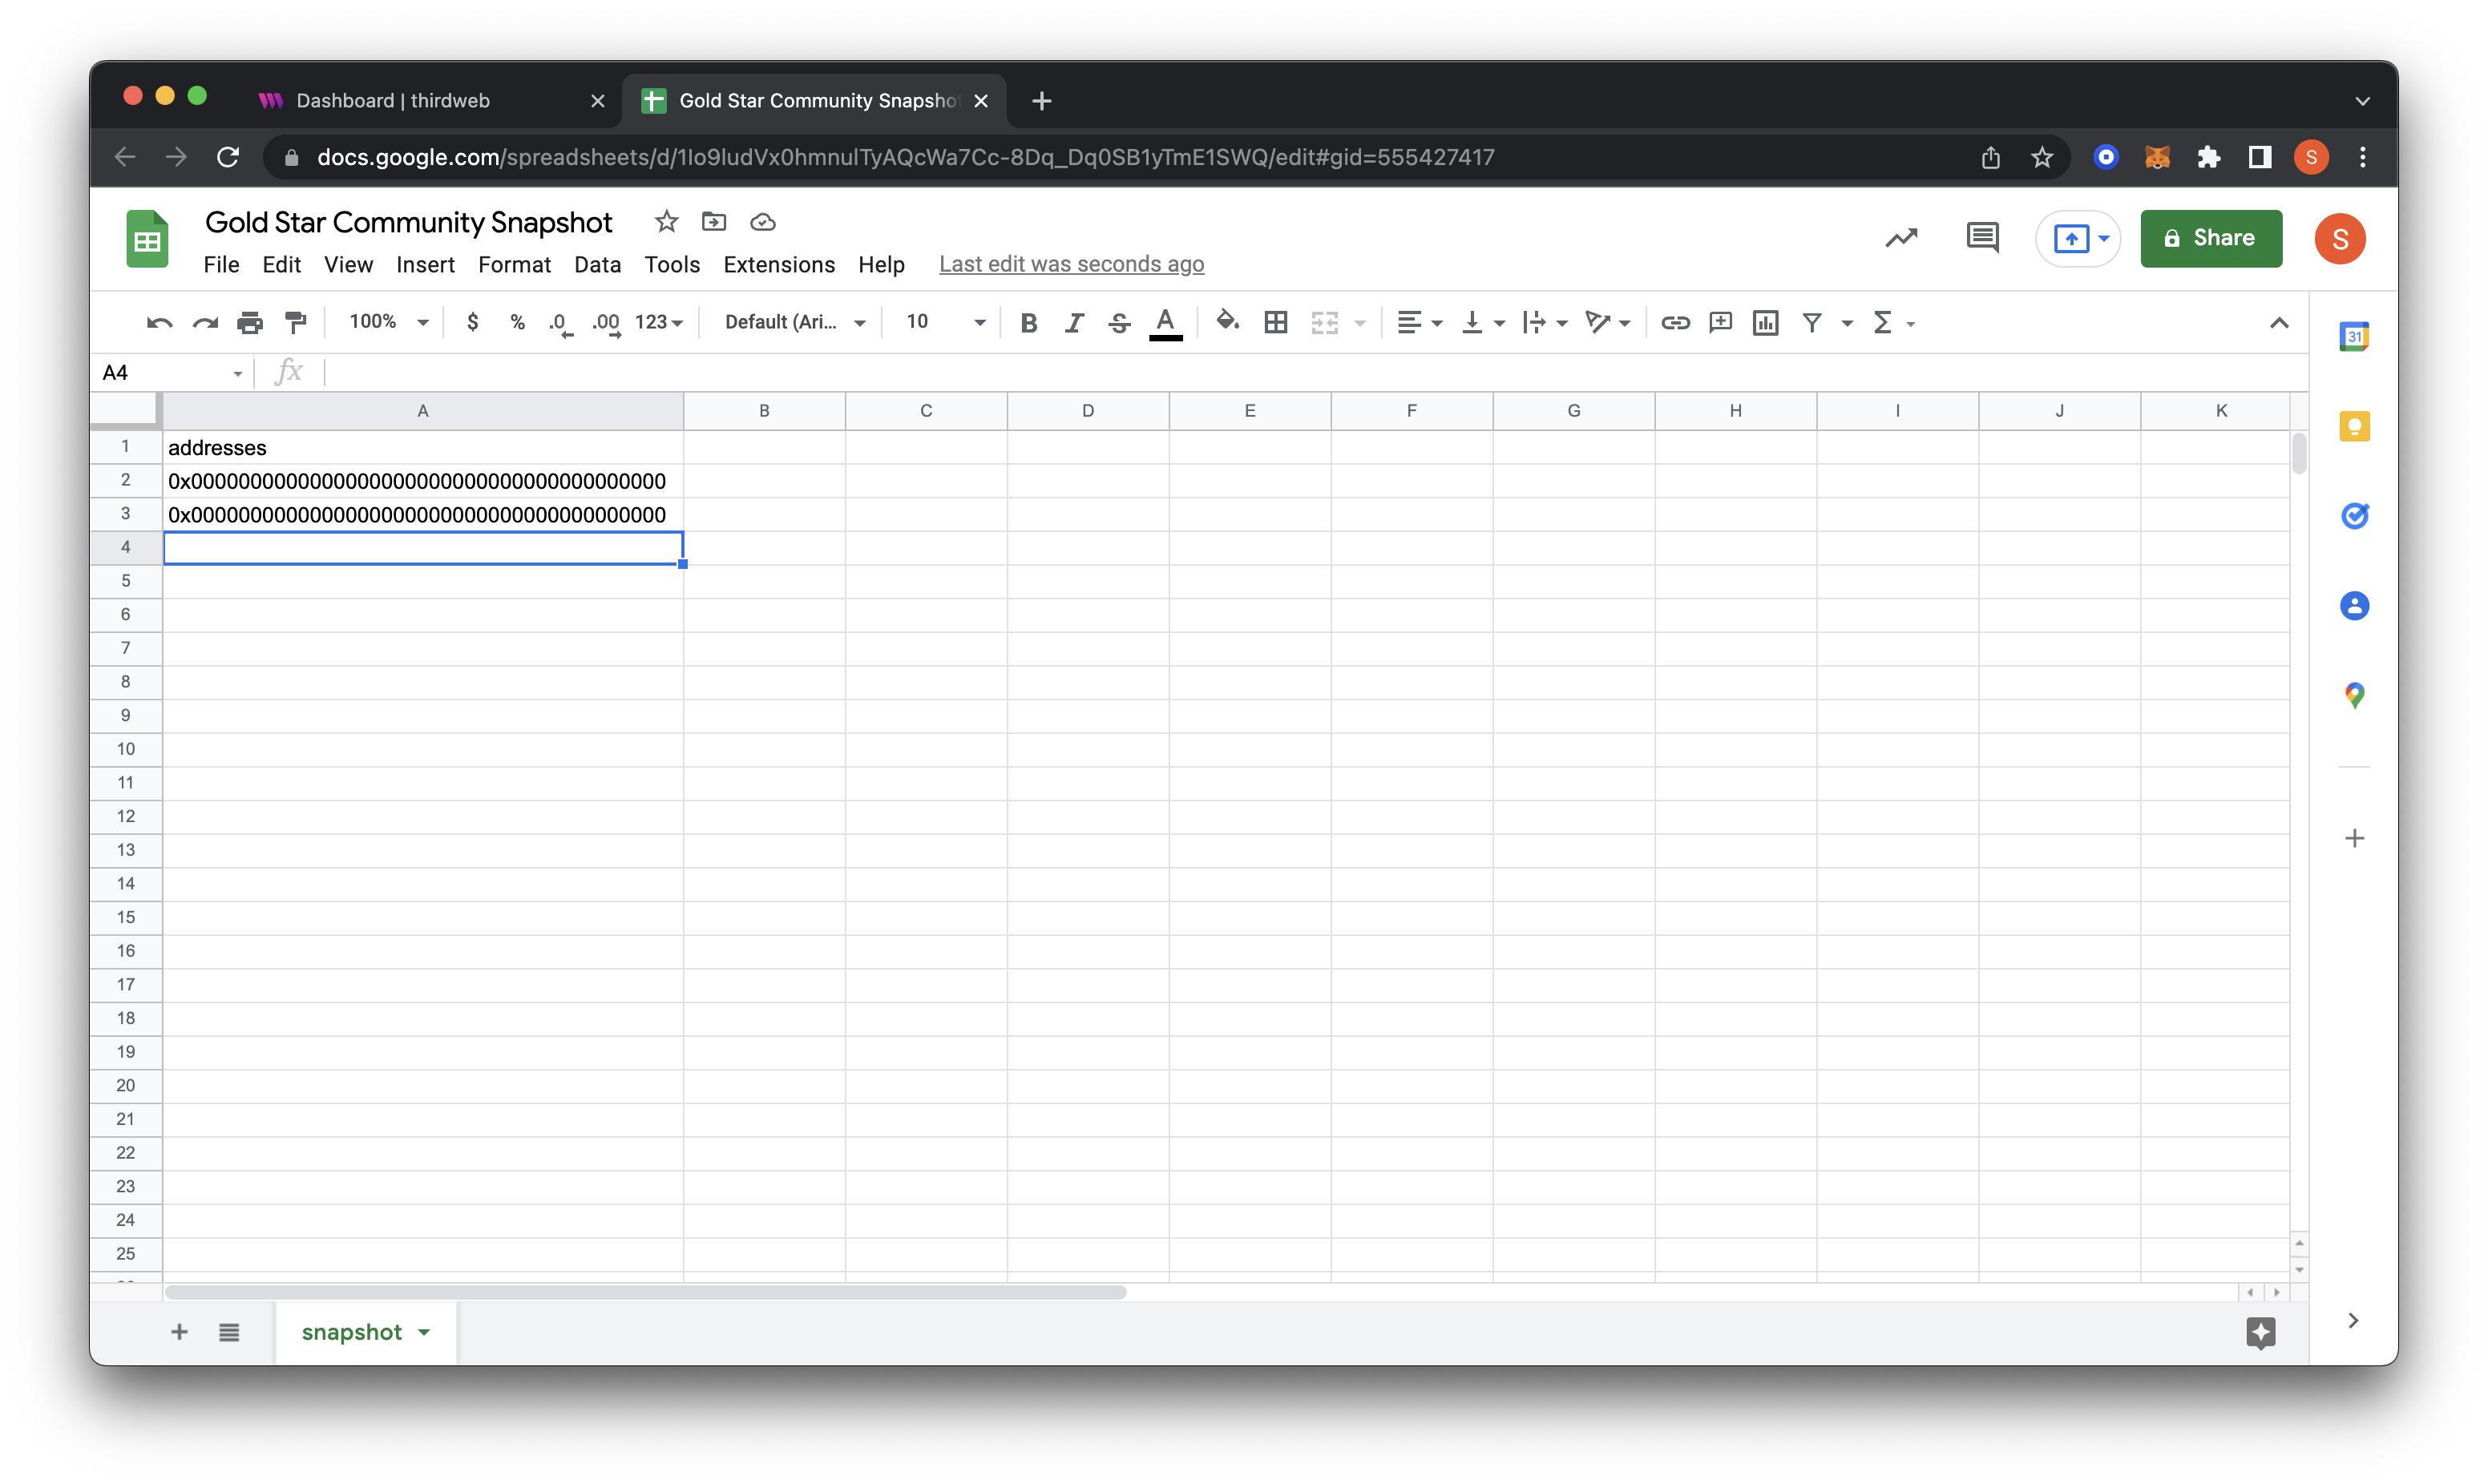
If you haven’t created one, let’s download the example .csv file and edit it in Microsoft Excel, Google Sheets, or another CSV editor. Only edit the first column by adding the wallet addresses allowed to mint during this phase.
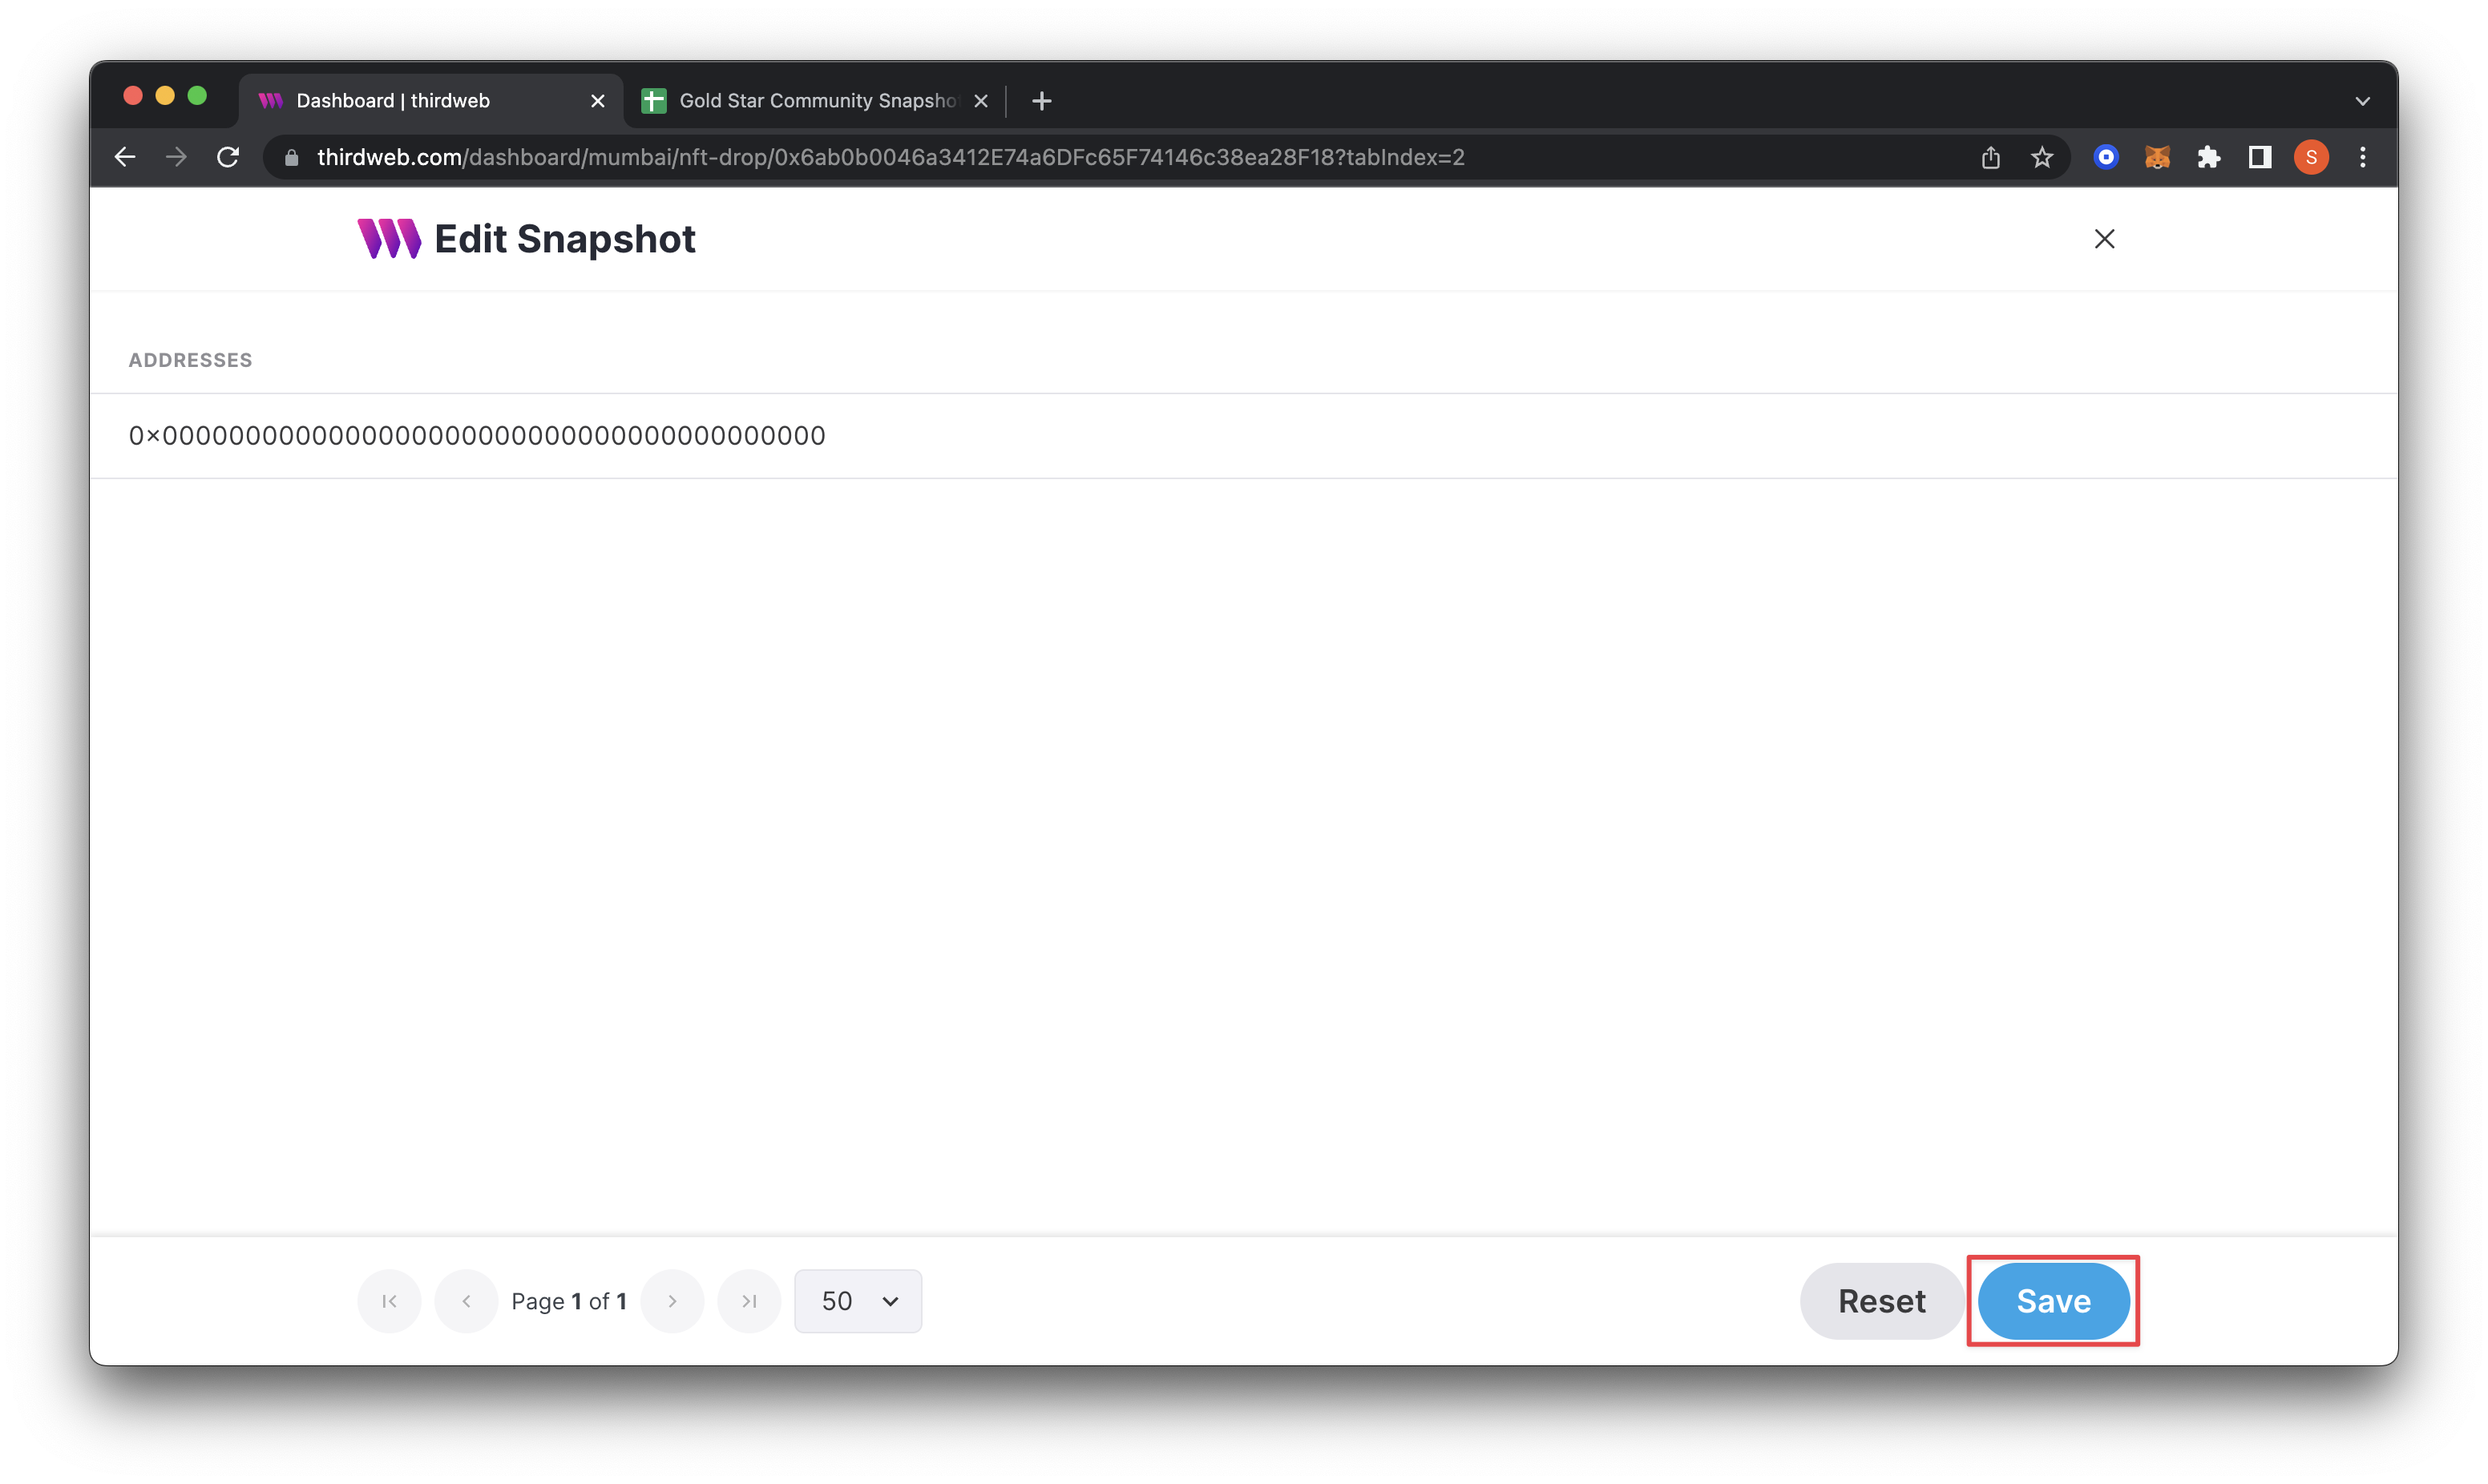
Drag and drop the newly created .csv file to the box. If it looks like it uploaded correctly, go ahead and save it. I am only pasting one fake address for this guide.
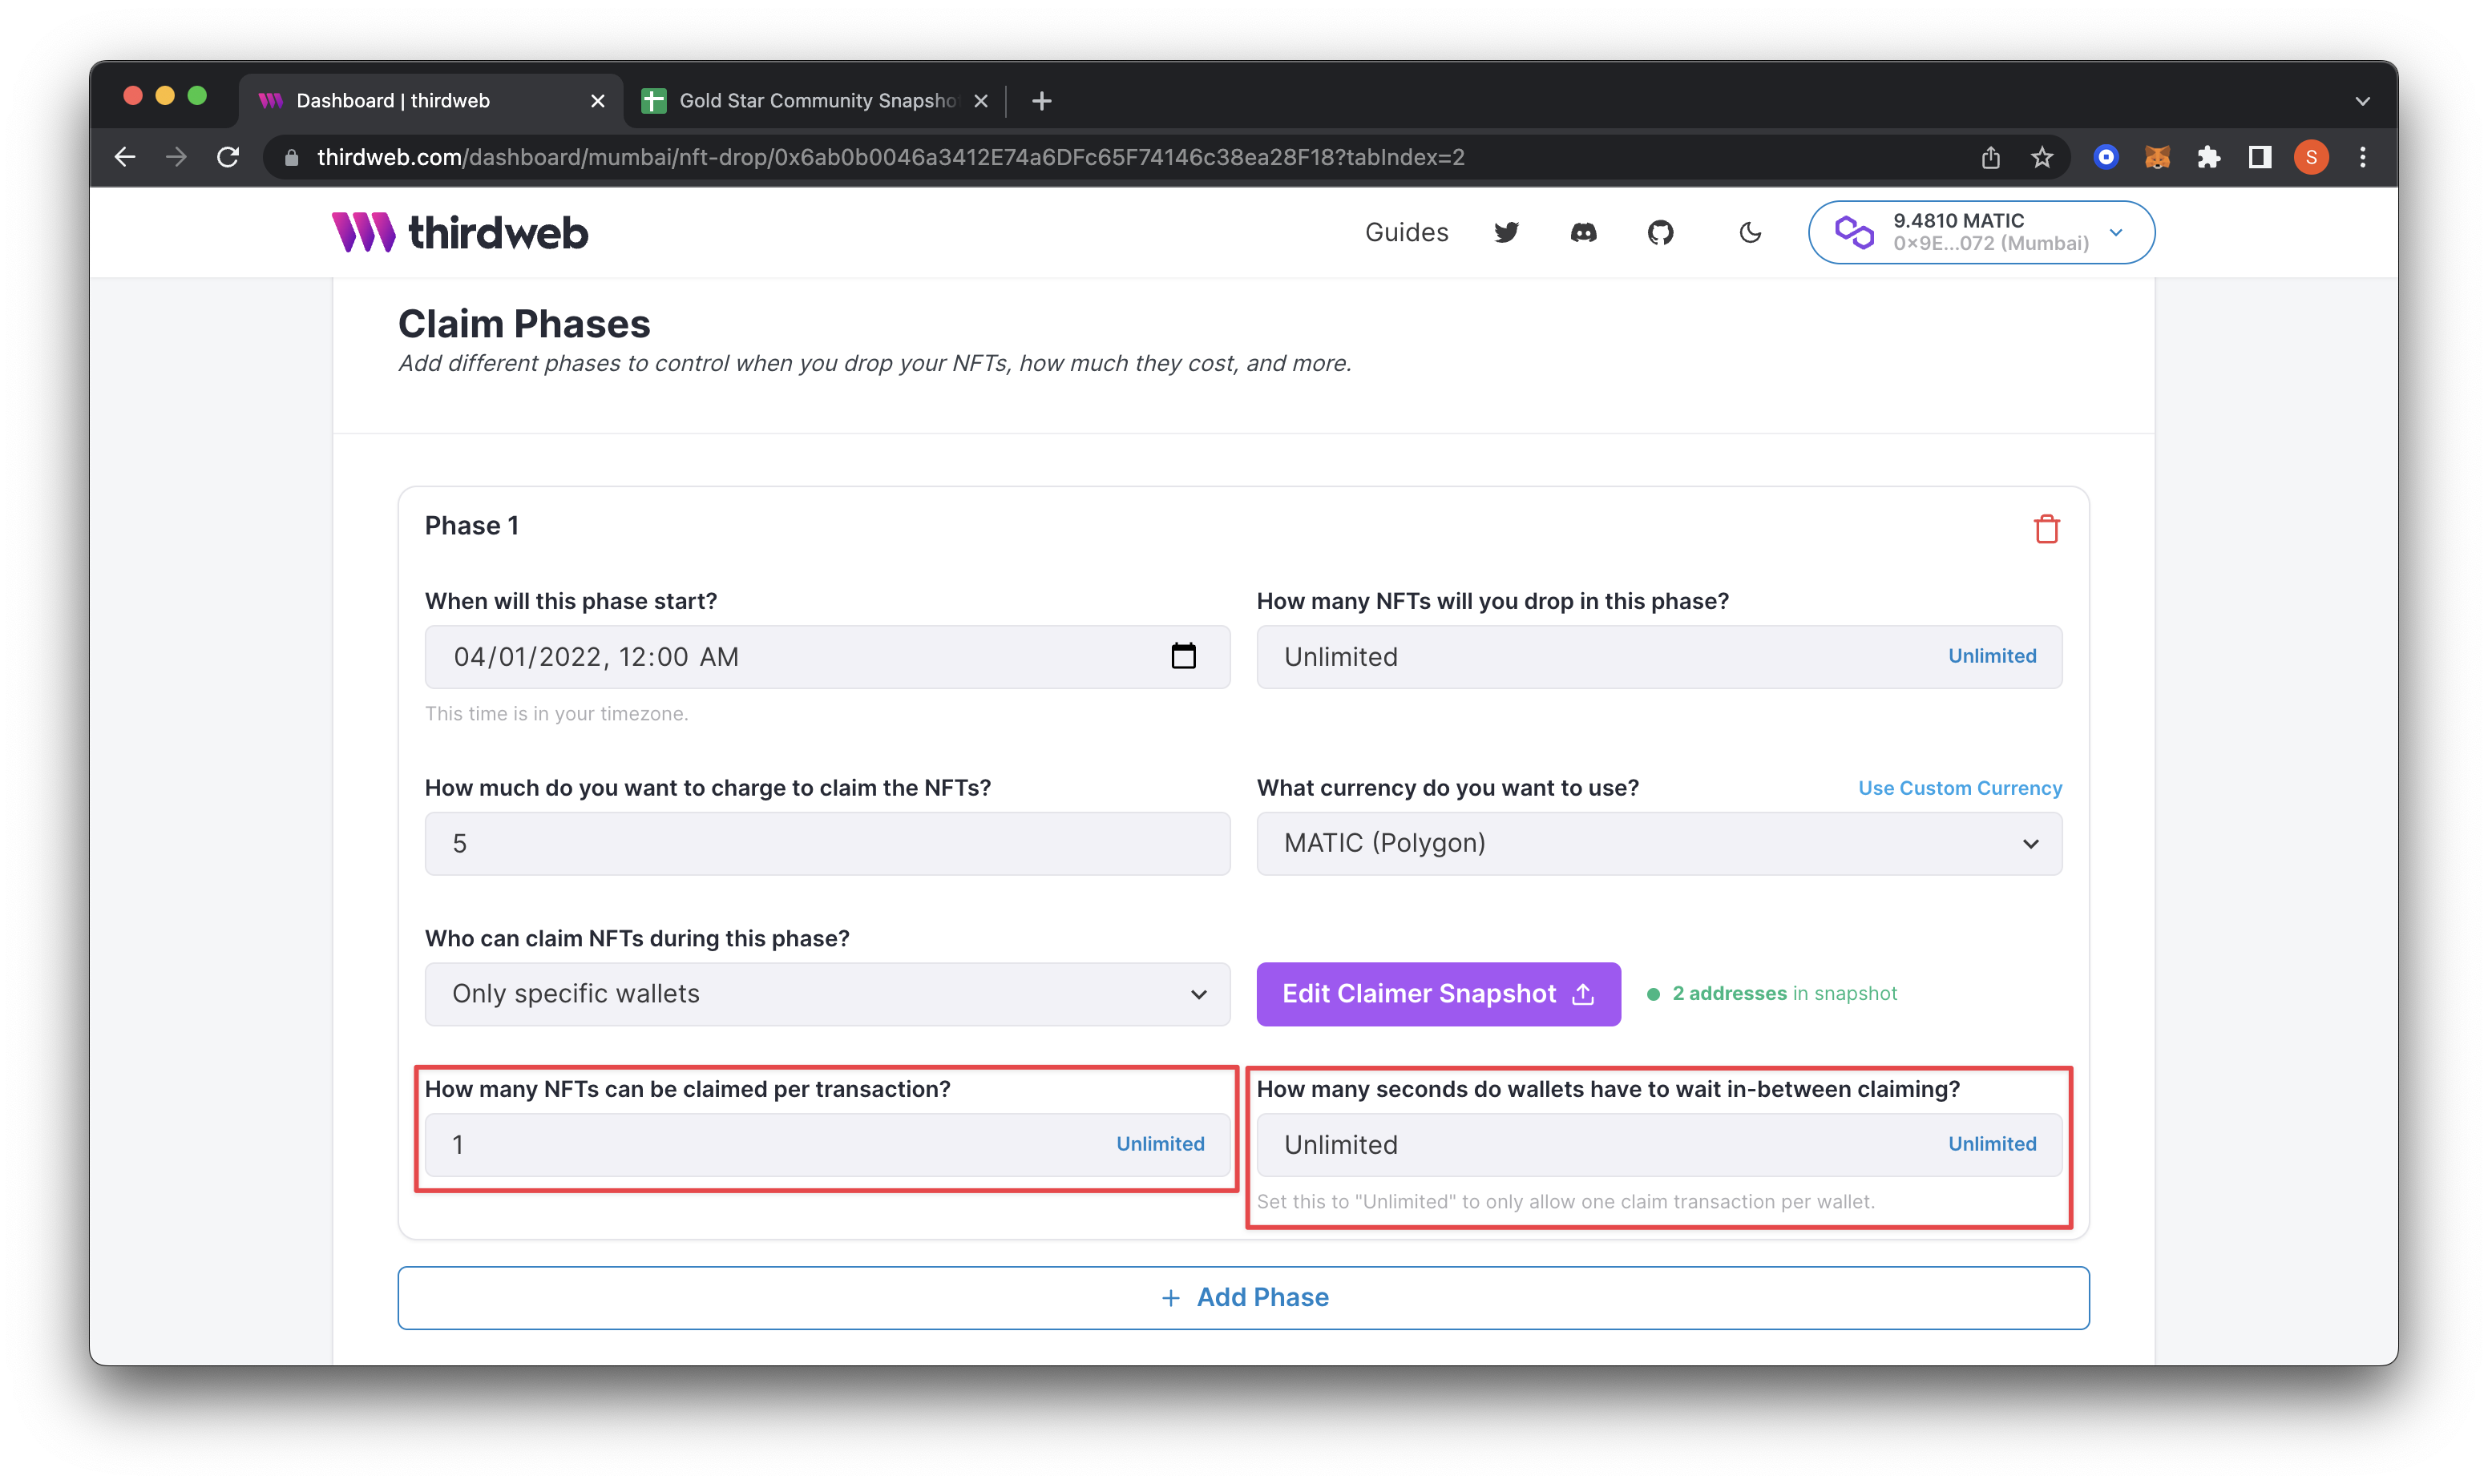
The last part of this phase is setting "How many NFTs can be claimed per transaction?" and "How many seconds do wallets have to wait in-between claiming?"
I want users to claim 1 NFT total per wallet. Therefore I will set the "How many NFTs can be claimed per transaction?" to 1. I will then change "How many seconds do wallets have to wait in between claiming?" to Unlimited because I want each wallet to only be able to get one NFT in total.
Add Second Phase
At this point, we can keep it to one phase if we want to create NFTs only for our community. In this guide, I will add a second claim phase that is open to the public.
We will press the + Add Phase button at the bottom. This action will pop up another tab for us to fill out. I will change this second phase to start a week after our first one on April 8th, 2022. We will only drop 700 in this phase, calculating the total overall at 1,000. And lastly, we will double the price to mint to 10 instead of 5. Feel free to adjust these values.
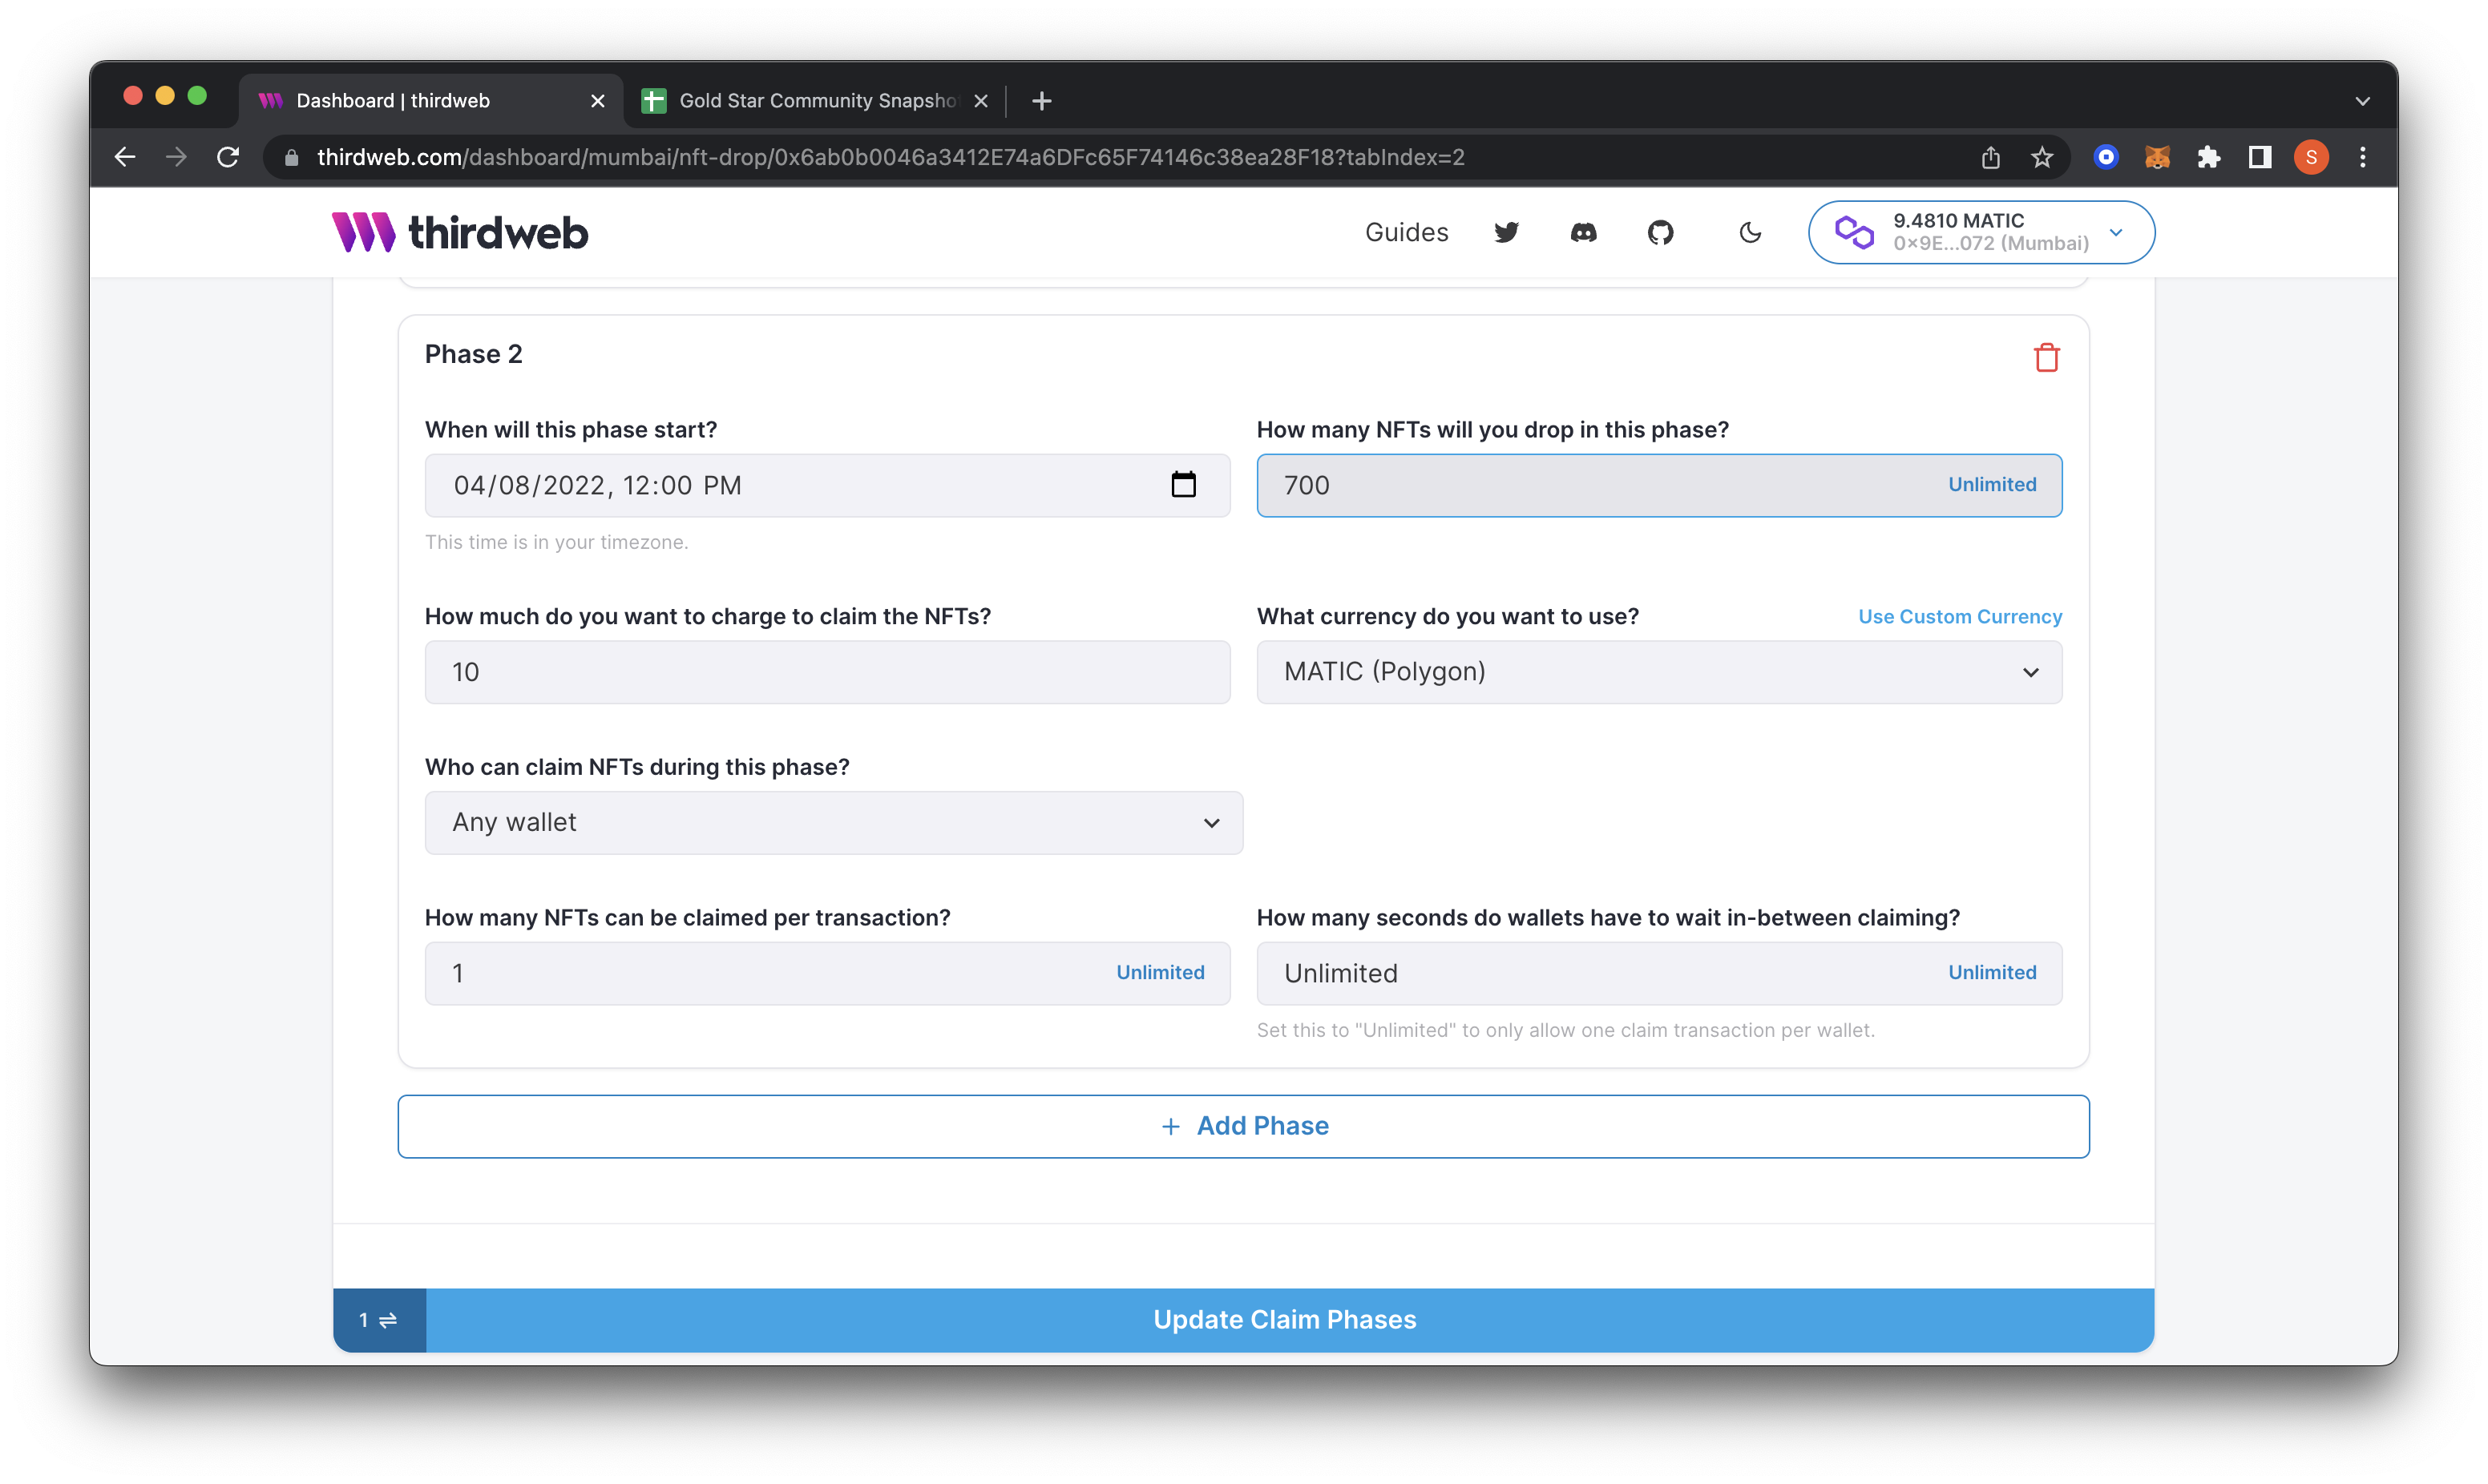
Since it is open to the public, we won’t upload a snapshot for this phase. I still want to limit it to 1 per wallet. Therefore we will keep the settings we had prior. Set “Update Claim Phases” to save your changes, and it will prompt you to confirm a transaction in your wallet.
Preview of Embed
Lastly, let’s look at how our drop looks using thirdweb’s embed. Navigate to the embed tab and scroll to see your claimable NFT button.
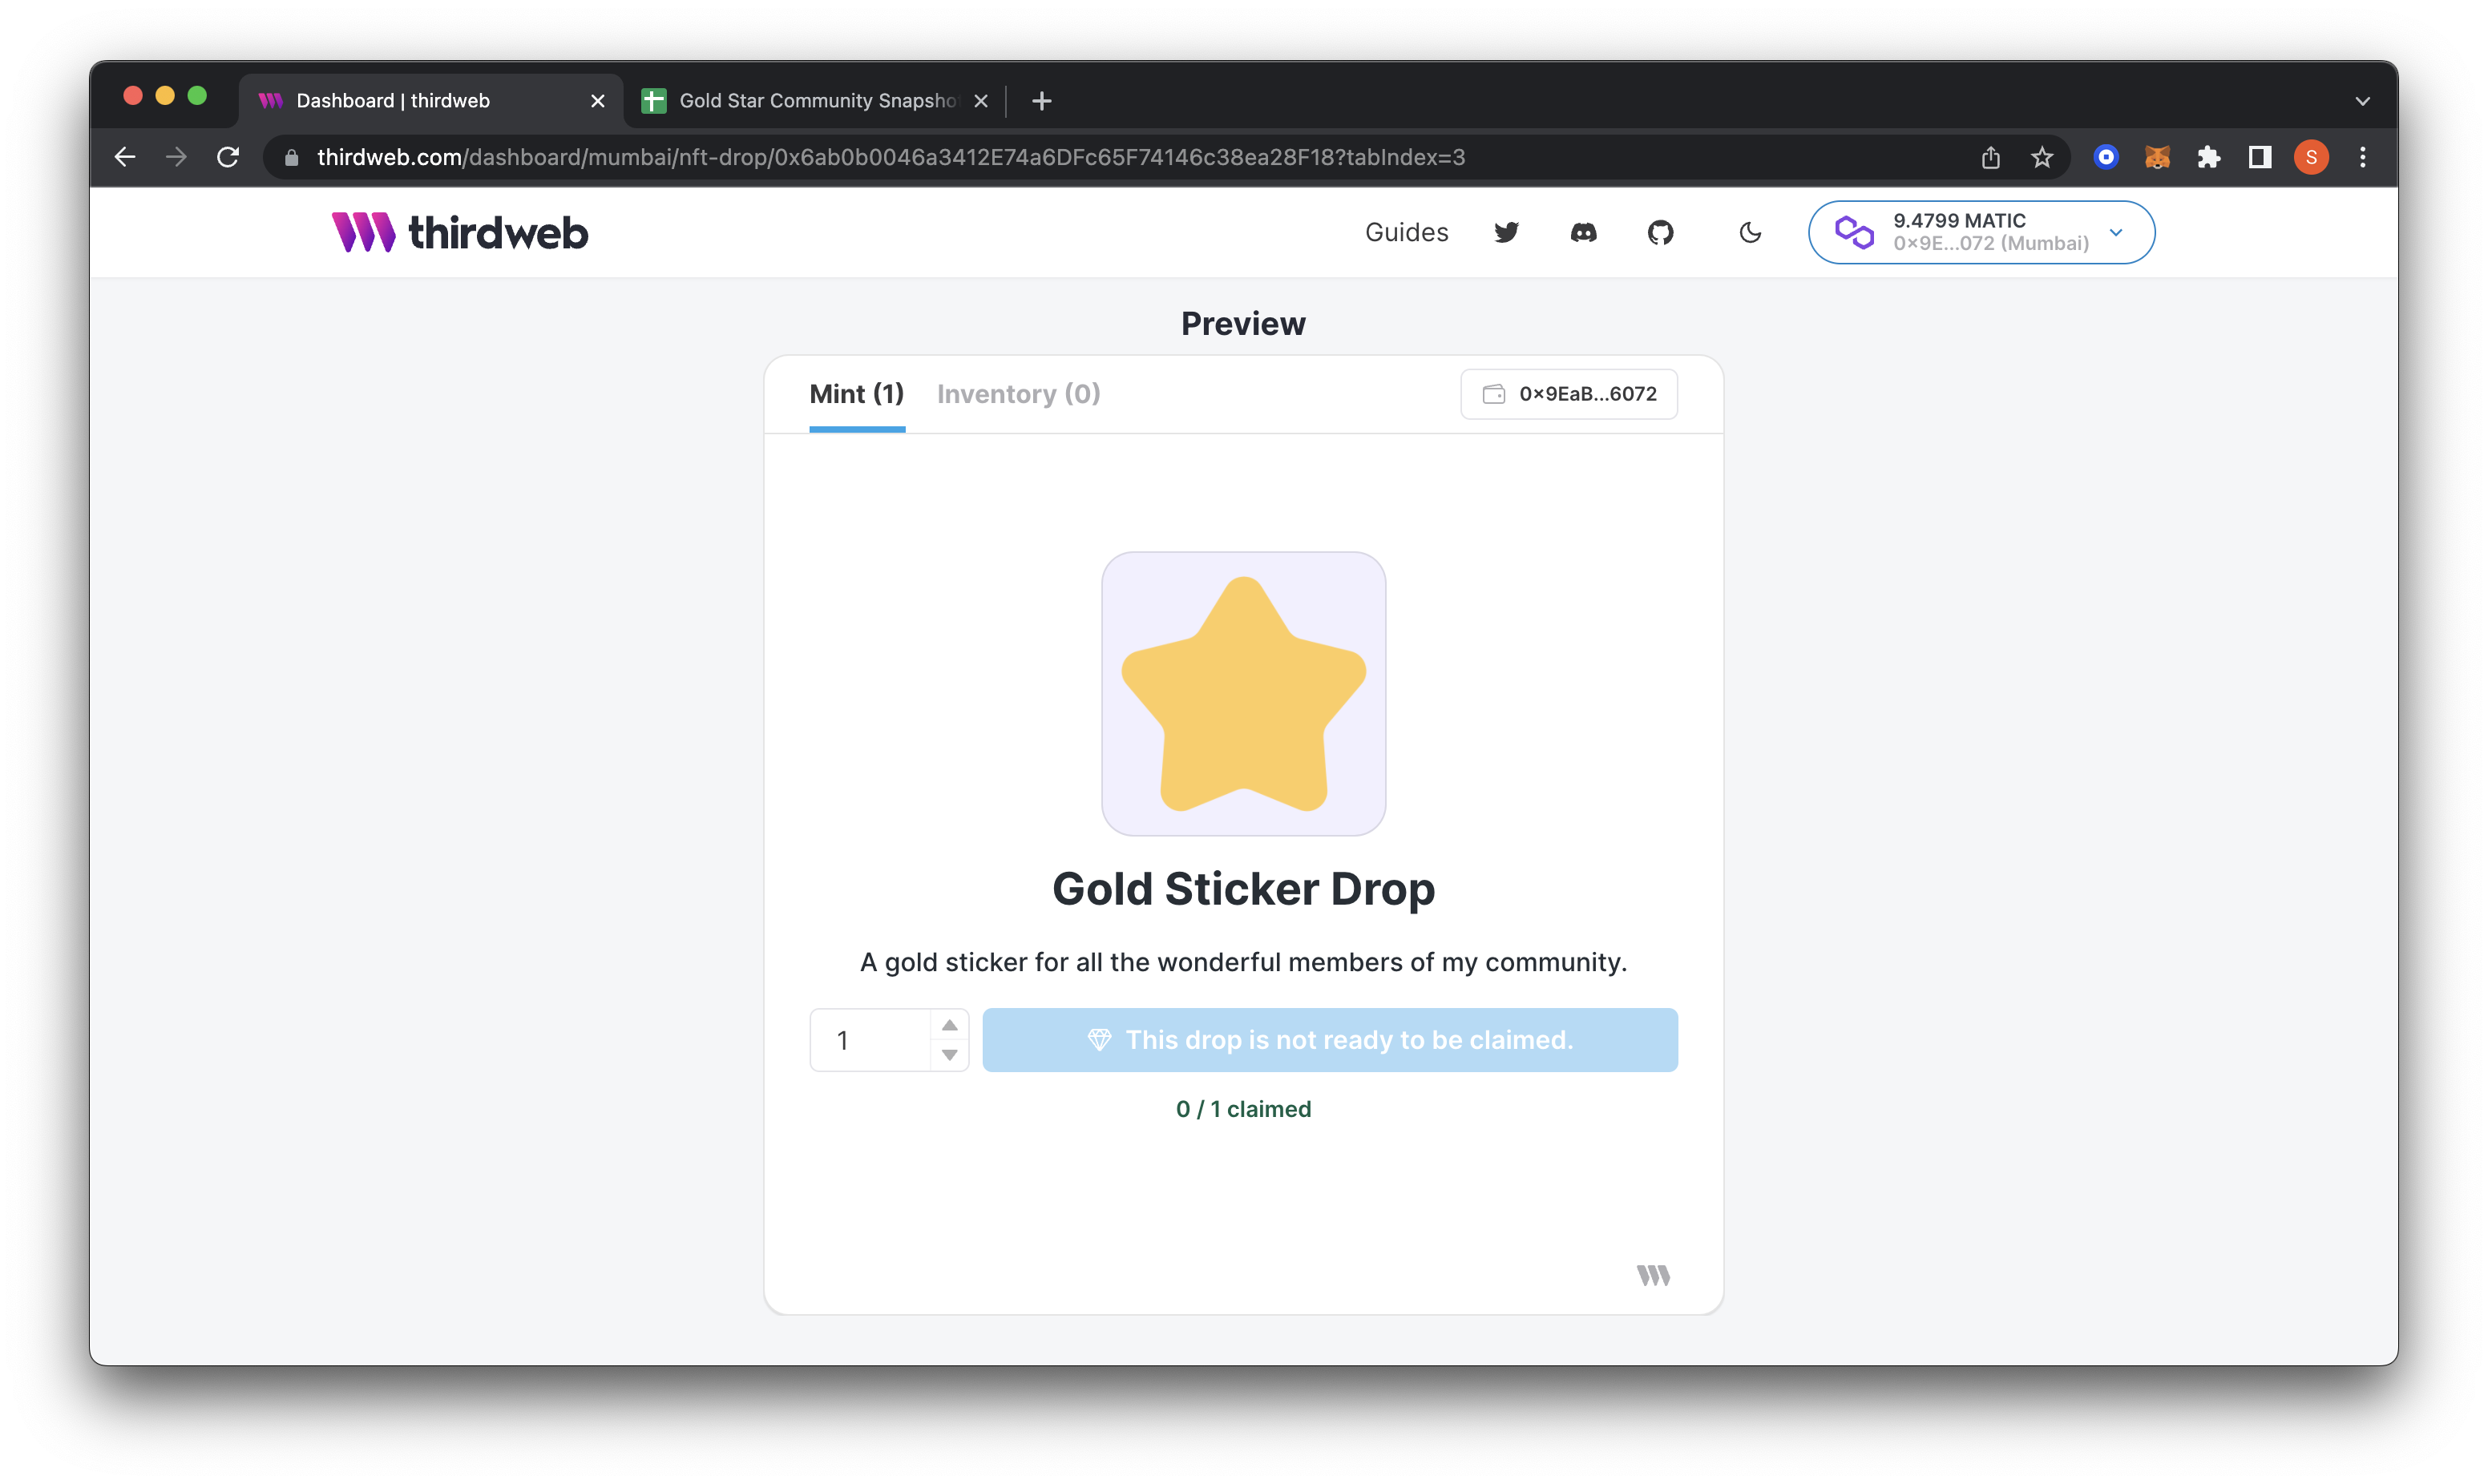
Notice how the embed states, "This drop is not yet ready to be claimed." This is because our first claim phase hasn't started yet. Once the phase starts this button will become available
We have successfully created two claim phases for the community and the public.
Happy minting!
