Building a Web3 App
Using the SDK, we can build a web app that allows users to mint NFTs from our contract.
This page will show you how to get started with the SDK and create a web application.
Creating a New App
The easiest way to get started is by using our CLI. This interactive tool creates a new project with the React and JavaScript SDKs pre-configured with a framework and language of your choice.
npx thirdweb create
You can start with one of our template projects by passing the --template flag and the name of the example repo.
Understanding the Code
Let's quickly take a look at the generated code to understand what's going on in our app.
This entry point of the app is where we configure the ThirdwebProvider, which allows us to use wallet connection features and interact with the desired blockchain.
import { ThirdwebProvider, ChainId } from "@thirdweb-dev/react";

// Here we can specify the chainId our app should run on
// In this example, we'll use the Ethereum Goerli Testnet
const desiredChainId = ChainId.Goerli;

export const MyApp = () => {
  return (
    <ThirdwebProvider desiredChainId={desiredChainId}>
      {/* Your App Goes Here */}
    </ThirdwebProvider>
  );
};
The template has a basic setup for users to connect their wallets to our page. It uses the useMetamask hook to let a user connect their wallet to your app.
import { useAddress, useMetamask, useDisconnect } from "@thirdweb-dev/react";

const Home = () => {
  const address = useAddress();
  // This function will allow the user to connect their metamask wallet to our page
  const connectWithMetamask = useMetamask();
  const disconnectWallet = useDisconnect();
  return (
    <div>
      {address ? (
        <>
          <button onClick={disconnectWallet}>Disconnect Wallet</button>
          <p>Your address: {address}</p>
        </>
      ) : (
        <button onClick={connectWithMetamask}>Connect with Metamask</button>
      )}
    </div>
  );
};
Interacting with your Smart Contract
Now that we have a new web3 app ready to go, we need to get our smart contract into the app so we can start interacting with it.
You can do this by getting your smart contract address from the dashboard by clicking the copy address button below the contract name.
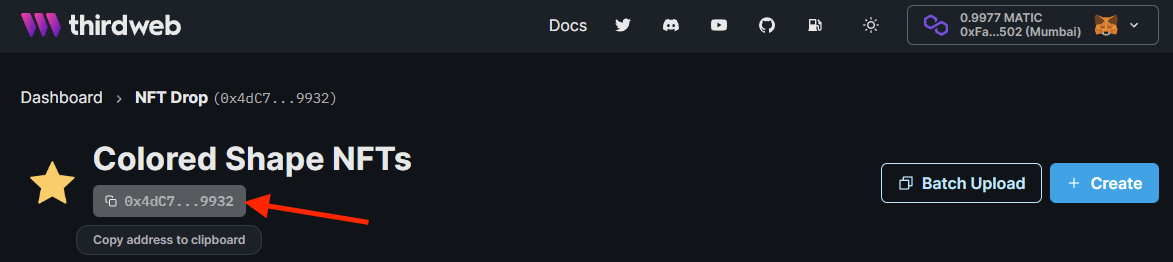
Copy this contract address, and use it to get an instance of your smart contract in code.
For example, we can get our NFT Drop contract using the code below:
import { useNFTDrop } from "@thirdweb-dev/react";

export default function Component() {
  const contract = useNFTDrop("<contract-address>");

  // Now you can use the nft drop contract in the rest of the component
}
Now you're ready to use the functions of your smart contract.
Read Data from your contract
You can now read data from your contract with any of our React hooks.
In the example below, we'll read and display all the NFTs on your drop contract.
import { useNFTDrop, useNFTs, ThirdwebNftMedia } from "@thirdweb-dev/react";

export default function NFTGalleryComponent() {
  const contract = useNFTDrop("<contract-address>");

  // Get all NFTs from this contract
  const { data: nfts, isLoading } = useNFTs(contract);

  // Display them in a gallery
  return (
    <div>
      {isLoading ? (
        <div>Loading...</div>
      ) : (
        <div>
          {nfts.map((nft, id) => (
            <>
              <ThirdwebNftMedia key={id} metadata={nft.metadata} />
              <h3>{nft.metadata.name}</h3>
            </>
          ))}
        </div>
      )}
    </div>
  );
}
Perform transactions on your contract
You can make transactions to your contract from your frontend with the connected wallet.
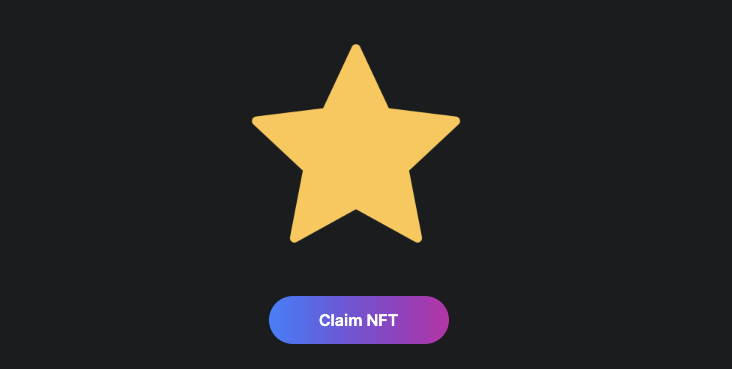
In the below example, we'll setup a simple claiming page so that users can connect to your website and claim NFTs from your drop. You can put this component anywhere in your app, the SDK will automatically prompt the connected wallet to execute the transaction.
import { useNFTDrop, useAddress, useClaimNFT } from "@thirdweb-dev/react";

export default function ClaimButtonComponent() {
  const contract = useNFTDrop("<contract-address>");
  const connectedWalletAddresss = useAddress();

  // Get the function to claim NFTs
  const { mutate: claim, isLoading } = useClaimNFT(contract);

  // And add a button to claim NFTs
  return (
    <button
      disabled={isLoading}
      onClick={() => claim({ to: connectedWalletAddresss, quantity: 1 })}
    >
      Claim NFT
    </button>
  );
}
Check out a live demo for this example and others on the thirdweb contract hub.
Next Steps
We've deployed an NFT Drop smart contract and an app to interact with it.
Next, we'll learn how you can build and release custom smart contracts using the Contracts SDK.